PyCharm is one of the most versatile and popular Python IDEs. It is a full-featured Python development environment with intelligent code assistance, debugging tools, integration with version control, and virtual environment controls.
This guide will explain how to install PyCharm on your system using different methods, depending on your operating system.
Prerequisites
- Access to the command line/terminal.
- Administrator privileges on the system.
How to Install PyCharm on Linux
There are two ways to install PyCharm on Linux:
- Via Toolbox app. Easy updates and centralized management.
- Manually. A hands-on approach without extra tools.
The sections below cover both methods.
PyCharm Installation on Linux via Toolbox App
To install PyCharm via the Toolbox app on Linux, download and set up the app first. Follow the steps below:
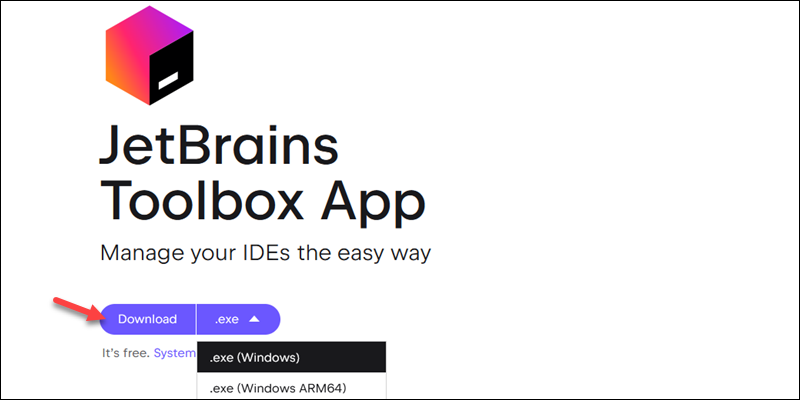
1. Download the Toolbox app tar.gz file from the official Jetbrains Toolbox App page.
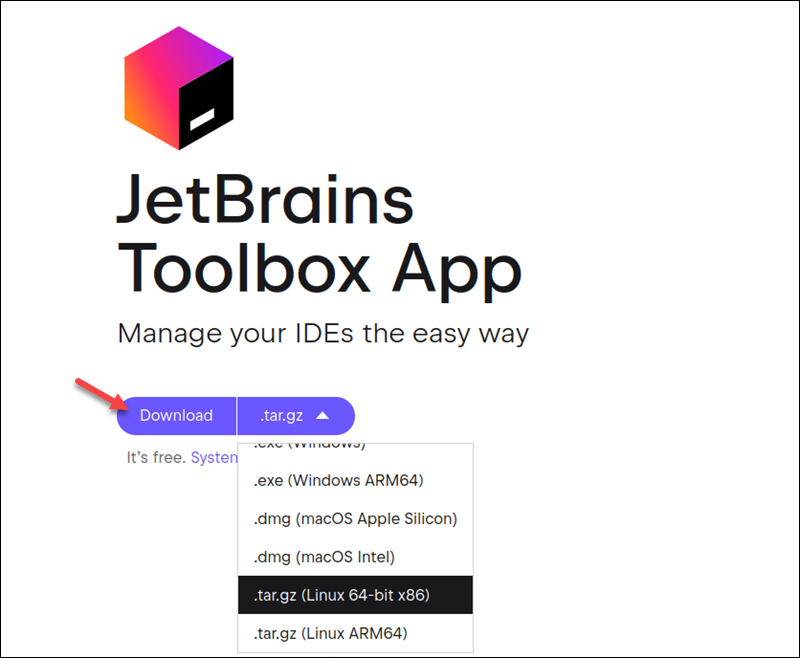
To switch the processor type, open the dropdown menu and choose between x64 or ARM64.
2. Extract the file to the desired location:
sudo tar xzf ~/Downloads/jetbrains-toolbox*.tar.gz -C ~/Downloads/The command extracts the file's contents to the ~/Downloads directory.
3. Navigate to the /bin subdirectory using the cd command:
cd ~/Downloads/jetbrains-toolbox*/bin
The terminal switches to the new location.
4. Launch the Toolbox app with:
./jetbrains-toolbox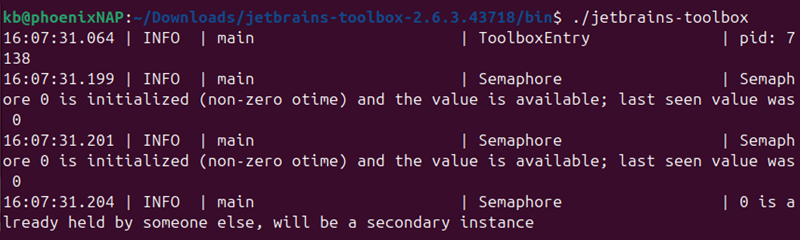
The first launch initializes various application files. The command also opens the Toolbox interface to the PyCharm page.
5. Click the Install button to start the installation.
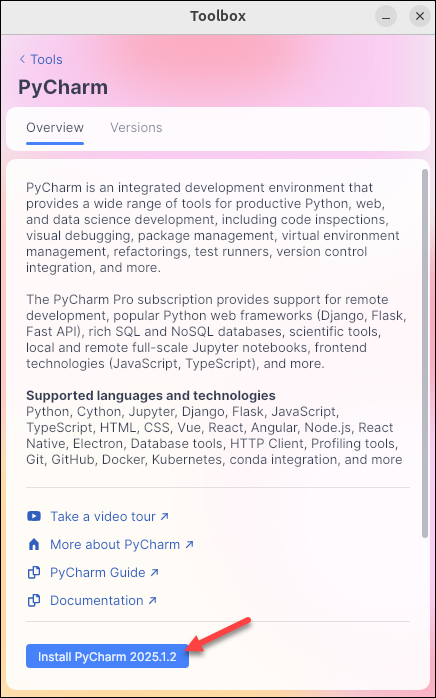
Alternatively, switch to the Versions tab and choose the desired version.
6. Once the download completes, the application is available in the Apps menu.
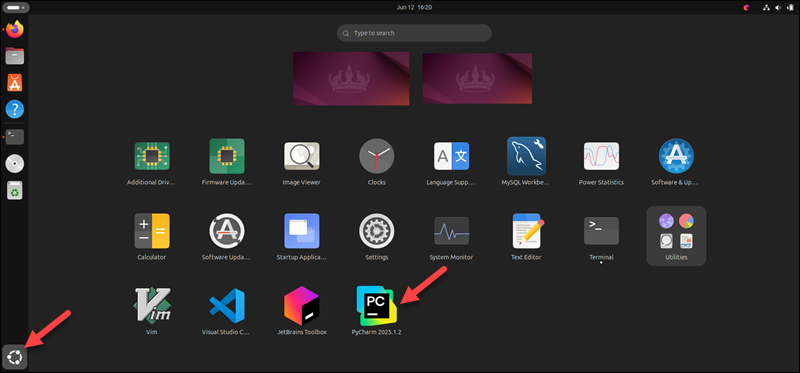
Click the icon to open and start using the IDE.
Manual PyCharm Installation on Linux
To manually install PyCharm on Linux, follow these steps:
1. Download the tarball from the PyCharm Linux downloads page.
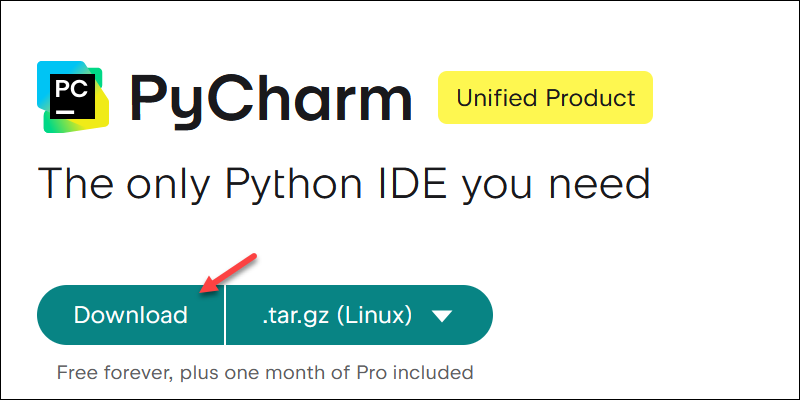
Open the dropdown menu to choose the ARM64 processor download instead.
2. In the terminal, extract the tar.gz file to the recommended installation directory (/opt):
sudo tar xzf ~/Downloads/pycharm-*.tar.gz -C /opt/The command does not produce an output. If you use a different directory, ensure it supports file execution and replace /opt/ in the command above.
3. Navigate to the /bin subdirectory:
cd /opt/pycharm-*/bin
The terminal switches to the directory that contains the installation script file.
4. Run the script with:
sh pycharm.shThe command opens a new window.
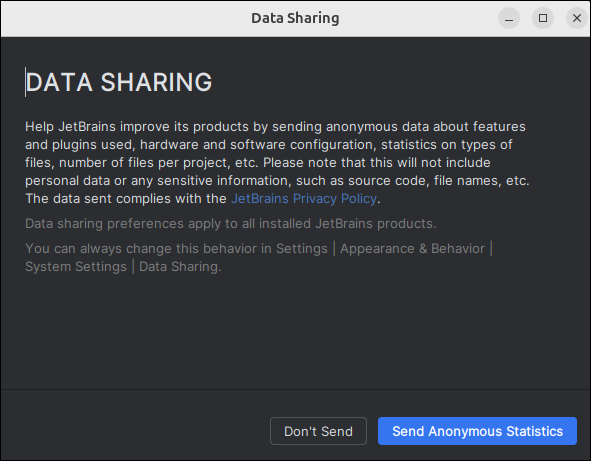
5. Choose whether to send anonymous statistics to JetBrains.
6. When using Visual Studio Code, select whether to import its configuration. Otherwise, skip this step.
7. After the initial setup, the IDE interface launches.
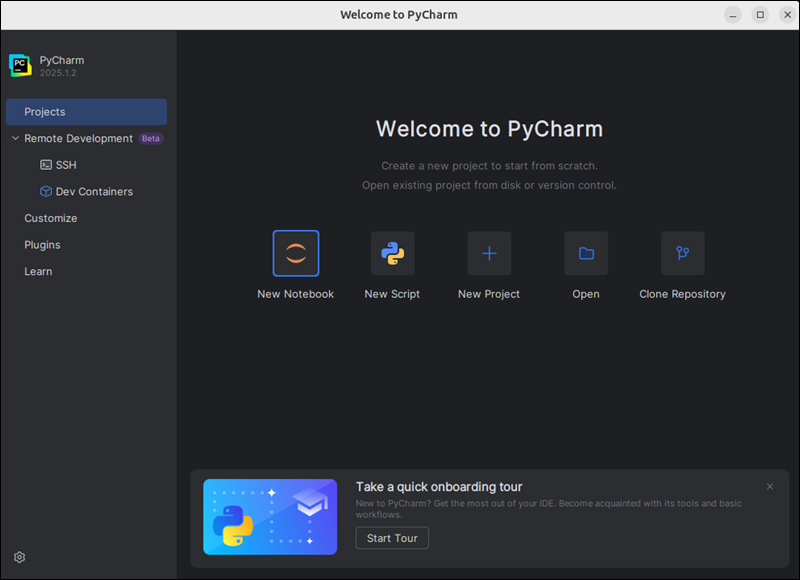
Run the same shell script to launch the IDE. A shortcut is also available in the Apps menu.
How to Install PyCharm on Windows
PyCharm is available for Windows through two different installation methods:
- Via Toolbox app. Simplifies managing JetBrains products.
- Manually. Download and set up the application from the official website.
The following sections show both methods.
PyCharm Installation on Windows via Toolbox App
To install PyCharm via the Toolbox app, follow the steps below:
1. Download the .exe Toolbox app installer for Windows from the JetBrains website.
For ARM64 processors, open the dropdown and select the appropriate installer.
2. Run the installer to start the wizard.
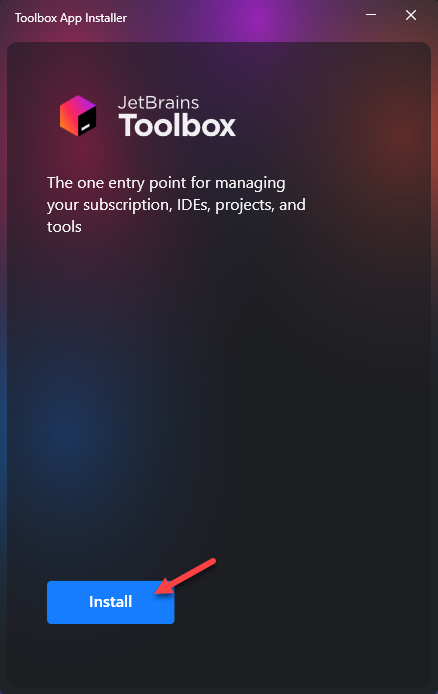
Click Install to start the installation process. The Toolbox app opens in the notification area.
3. Agree to the JetBrains user agreement and choose whether to send anonymous usage statistics.
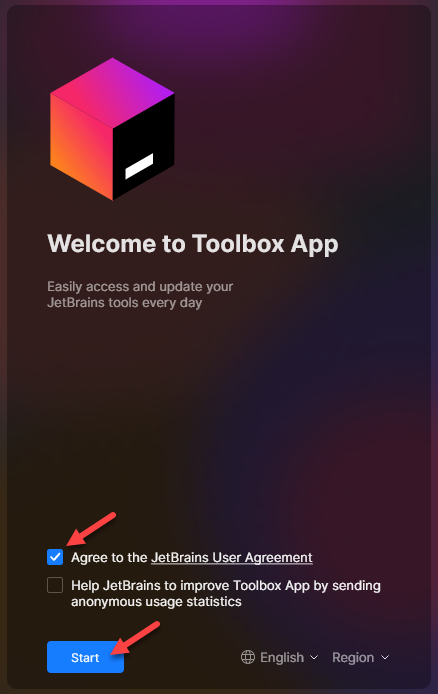
Click Start to open the application.
4. Locate PyCharm and click Install.
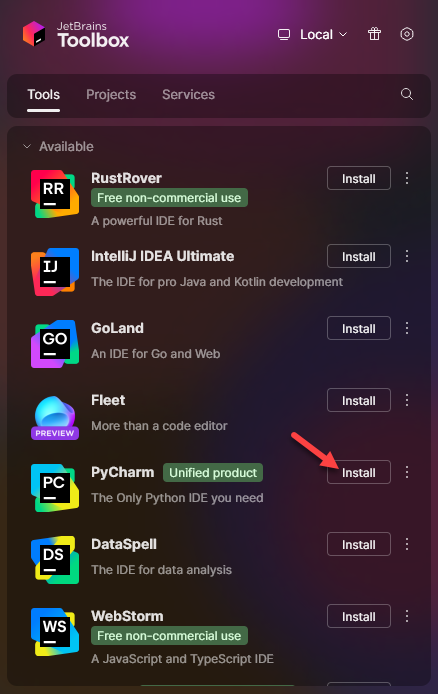
To choose a different version, click the three dots and select Available versions.
5. The PyCharm app is available in the Installed section.
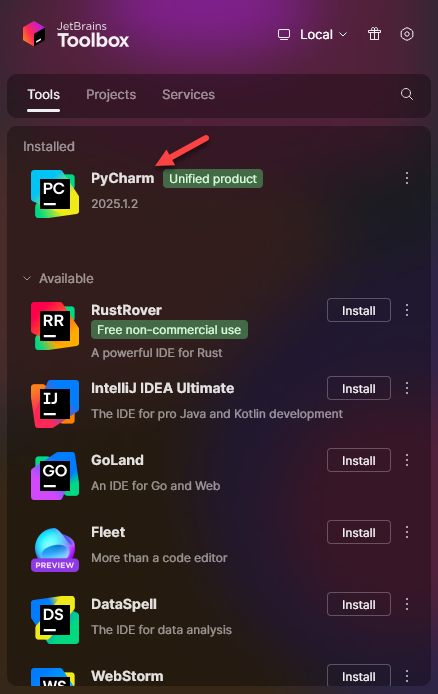
Click it to start the program.
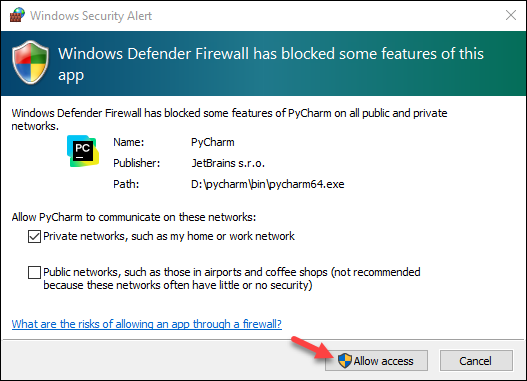
6. If Windows Defender blocks the application, click Allow access to bypass the firewall.
7. Choose whether to share data anonymously with JetBrains.
8. If you are migrating from Visual Studio Code, import its settings into PyCharm.
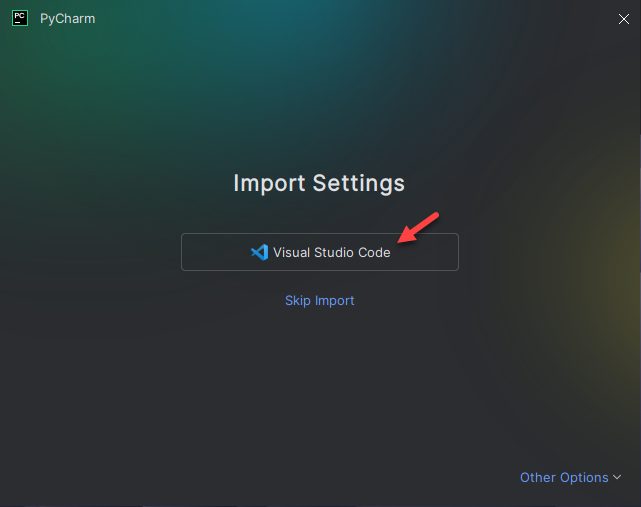
If you do not use VS code, skip this step.
The IDE is now ready to use.
Manual PyCharm Installation on Windows
To manually set up PyCharm on Windows:
1. Download the .exe installer from the PyCharm downloads page for Windows.
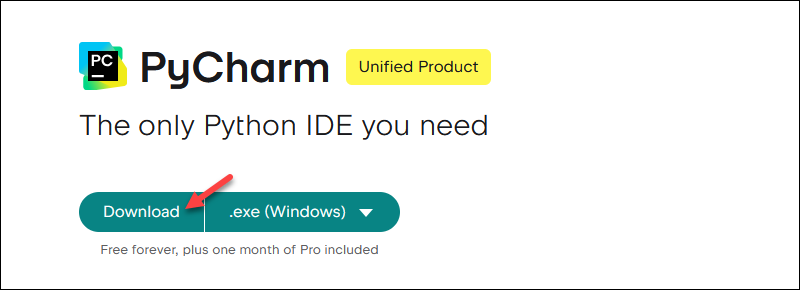
The dropdown menu contains the installer for different processors.
2. Start the installer to begin the setup.
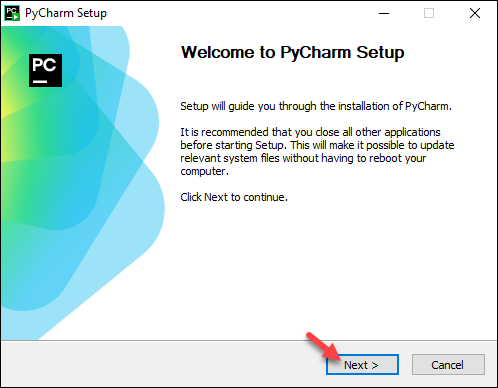
Click Next to continue.
3. Click Browse and choose the installation location. Ensure the location has enough space.
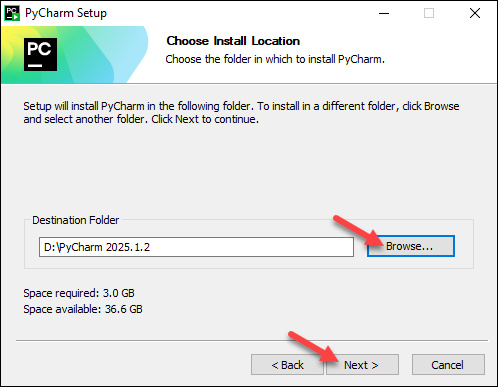
Click Next to proceed.
4. Select the desired installation options. We recommend checking all the options.
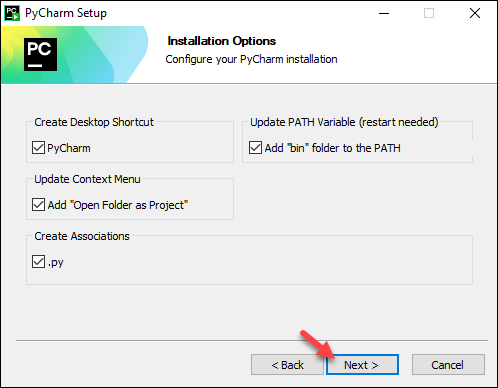
Continue to the next step.
5. Select an existing Start menu folder or create a new one. The folder contains the application shortcut in the Start menu.
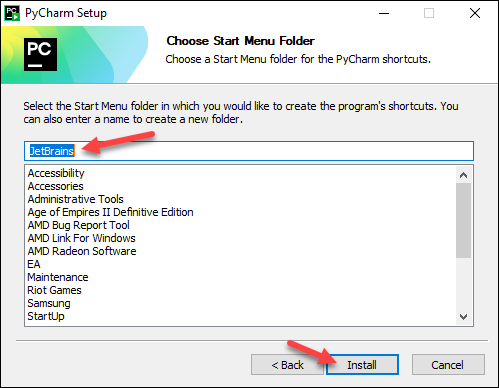
Click Install to begin the installation.
6. Once completed, choose whether to reboot immediately or manually at a later time. Click Finish to complete the installation.
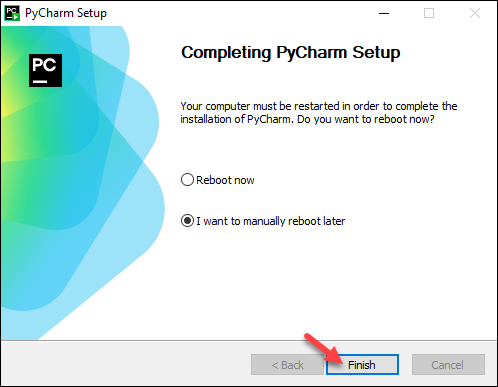
The application is available in the start menu.
It also appears as a desktop icon if the option was selected during installation.
How to Install PyCharm on macOS
PyCharm can also be installed in two ways on macOS:
- Via Toolbox app. Ideal for managing multiple JetBrains tools.
- Manually. Downloading and setting up the app from the website.
See the detailed steps in the sections below.
PyCharm Installation on macOS via Toolbox App
Download the Toolbox app first, then install PyCharm:
1. Navigate to the JetBrains Toolbox app downloads page and download the .dmg disk image for your processor.

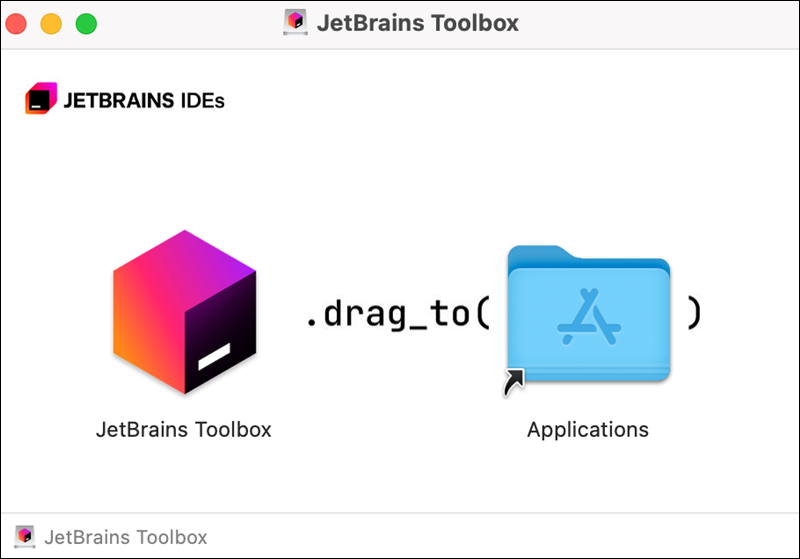
2. Mount the image and drag the JetBrains Toolbox app to the Applications folder.
3. Run the Toolbox app. Accept the license agreement and choose whether to send anonymous usage statistics to JetBrains.
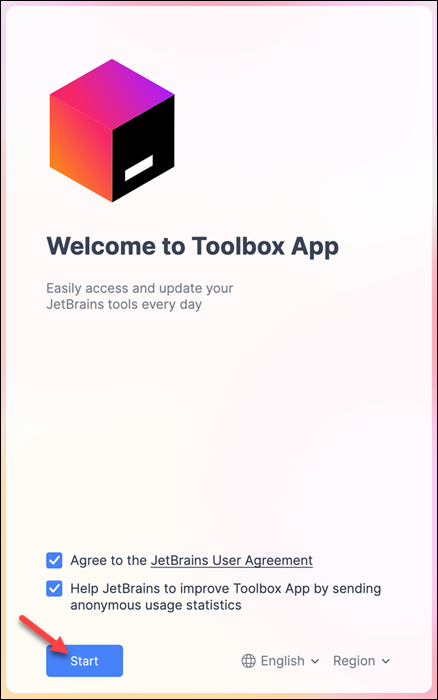
Click Start to open the application.
4. The app lists all the available JetBrains products to install. Install PyCharm from the list.
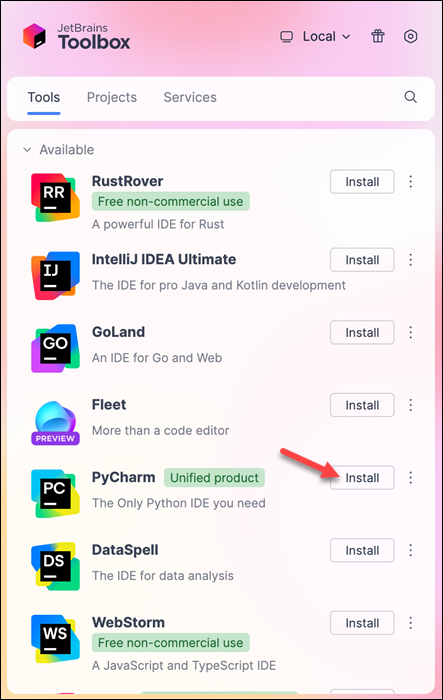
To change to a different version, click the three dots next to the name and select Available Versions.
5. Wait for the installation to complete.
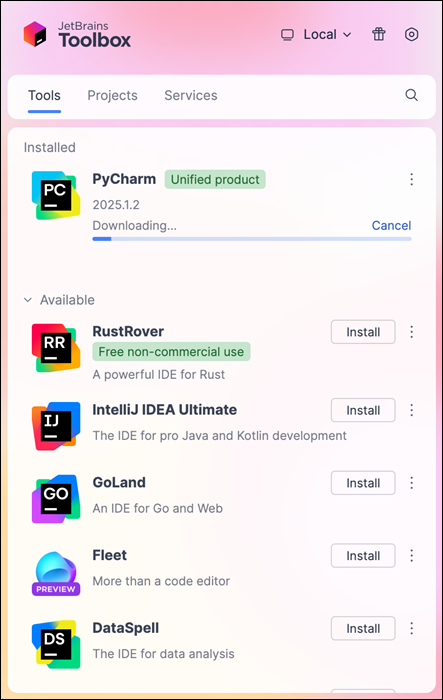
6. Click the application from the Toolbox app to start the IDE.
Manual PyCharm Installation on macOS
To manually install PyCharm on macOS:
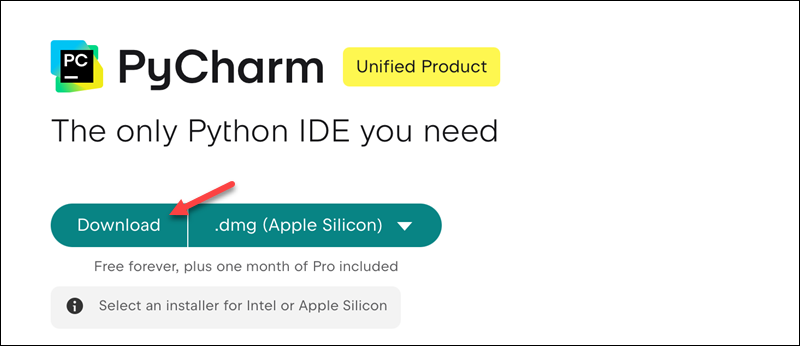
1. Navigate to the PyCharm Mac downloads page. It contains the official installer.
2. Select the processor type (Intel or Apple Silicon) and click Download.
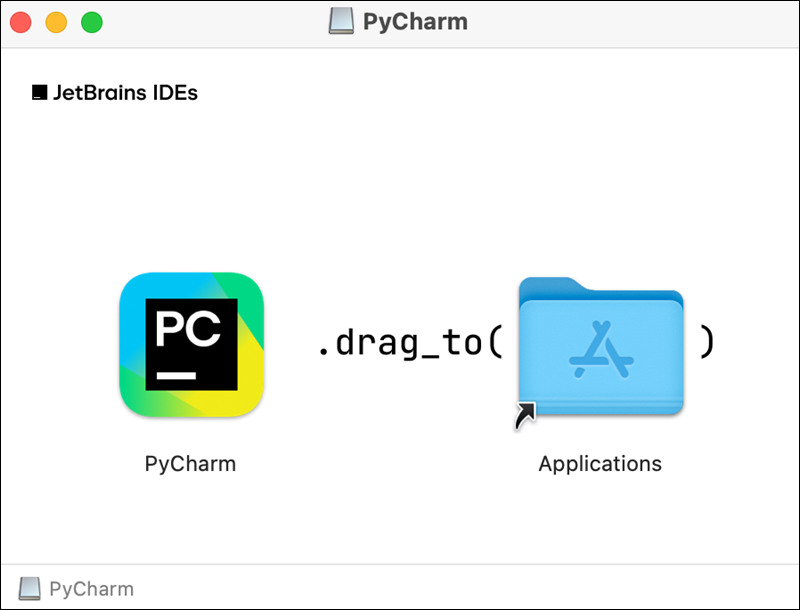
3. Mount the disk image and drag the PyCharm app to the Applications folder.
4. The IDE is installed and ready to use.
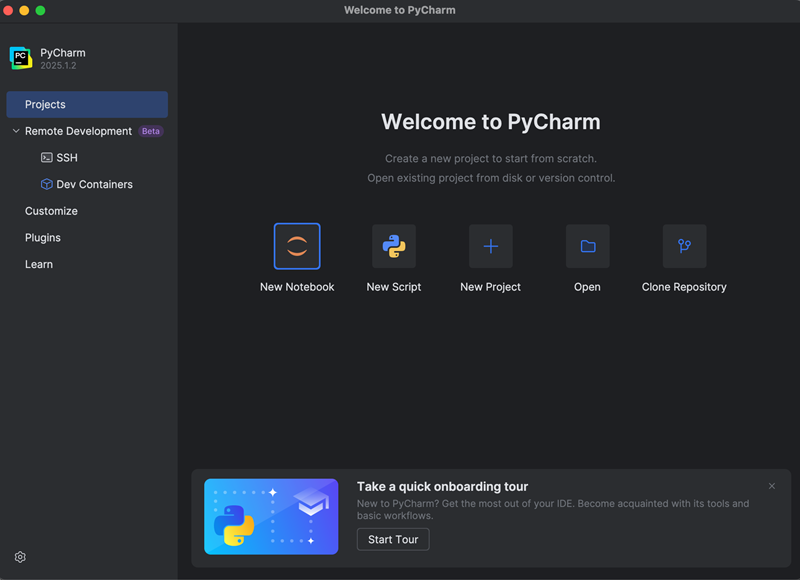
Run it from the Applications folder, Launchpad, or Spotlight.
Conclusion
This guide explained how to download and install PyCharm in two different ways for Linux, Windows, and Mac. Continue configuring the development environment to match your workflow and project requirements.
Next, read more about how Python Poetry can help with managing dependencies in your Python project.