Veeam Cloud Connect enables existing Veeam users to quickly and efficiently create offsite cloud backup copies to one of five phoenixNAP Veeam infrastructure locations:
- Phoenix, AZ, USA
- Ashburn, VA, USA
- Atlanta, Georgia
- Amsterdam, Netherlands
- Singapore, Southeast Asia
phxcloudconnect.phoenixnap.com All Cloud Backup for Veeam repositories at the Phoenix location established prior to February 20, 2019 had been assigned to the phxcloudconnect.phoenixnap.com server address. If for some reason, you need to reconfigure your setup, please use the above-mentioned server address and NOT phxcloudconnect2.phoenixnap.com.
Here you will learn how to configure your Veeam Backups within the Veeam Backup and Replication console to point to your new storage quota on the phoenixNAP cloud environment.
Add Service Provider
To start using the contracted storage for your Veeam backups, first, add phoenixNAP as your service provider.
To do so, launch the Veeam Backup and Replication console from your computer and follow these steps:
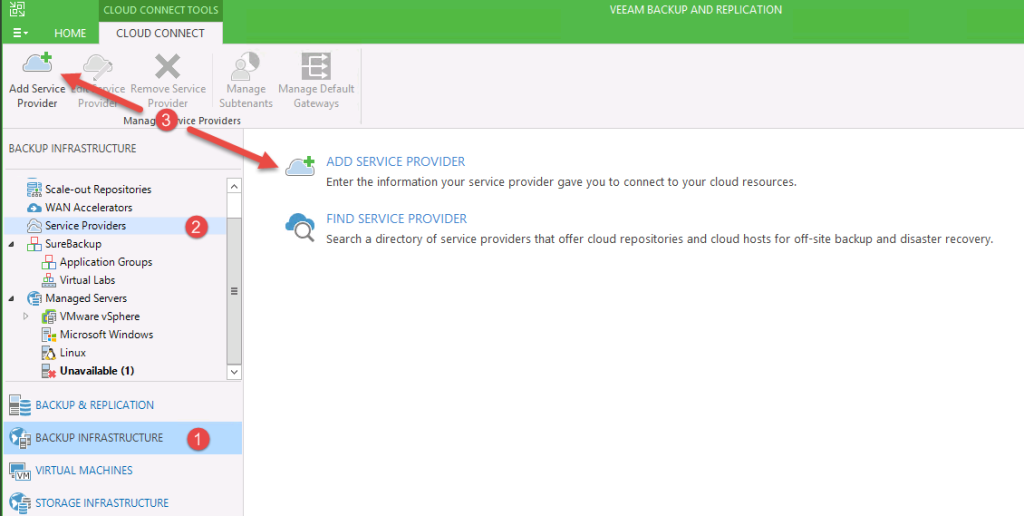
1. Navigate to the Backup Infrastructure section.
2. Select Service Providers.
3. Click one of the Add Service Provider buttons to start the wizard.
4. Enter the URL for your Veeam Cloud Connect Backup repository in the DNS name or IP address field:
- Phoenix - phxcloudconnect2.phoenixnap.com
- Ashburn - ashcloudconnect.phoenixnap.com
- Atlanta - atlcloudconnect.phoenixnap.com
- Amsterdam - nldcloudconnect.phoenixnap.com
- Singapore - sincloudconnect.phoenixnap.com
5. Insert the desired Description for the service provider.
6. Do not change the Port value; it must always be 6180.
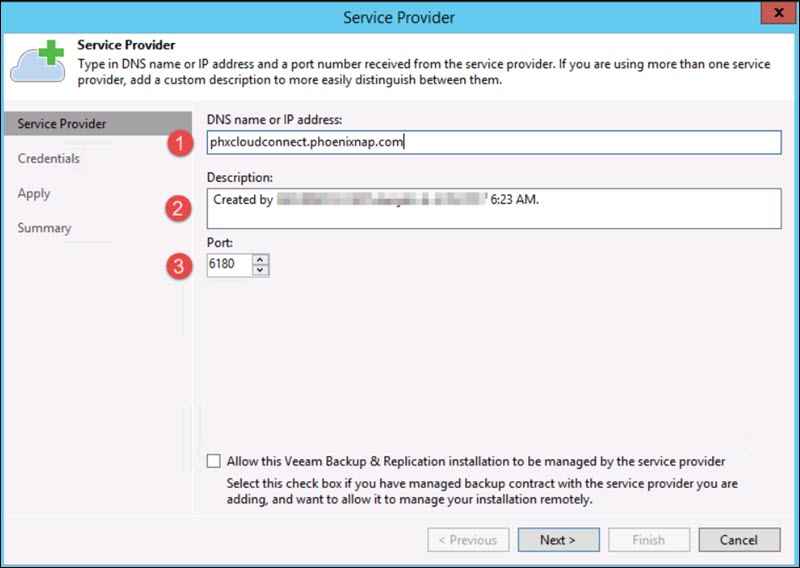
7. Click Next to proceed.
8. Click Add… next to the Credentials field.

9. Enter the provided Username and Password as well as the Description for the user.
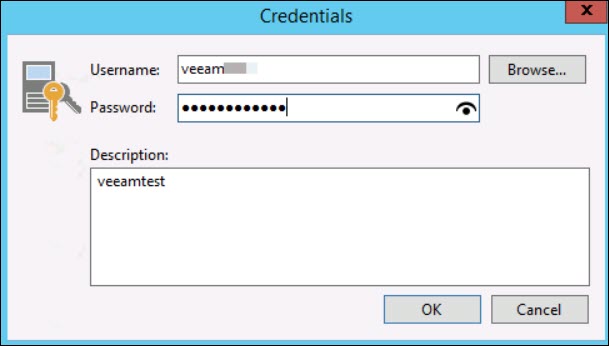
10. Click OK.
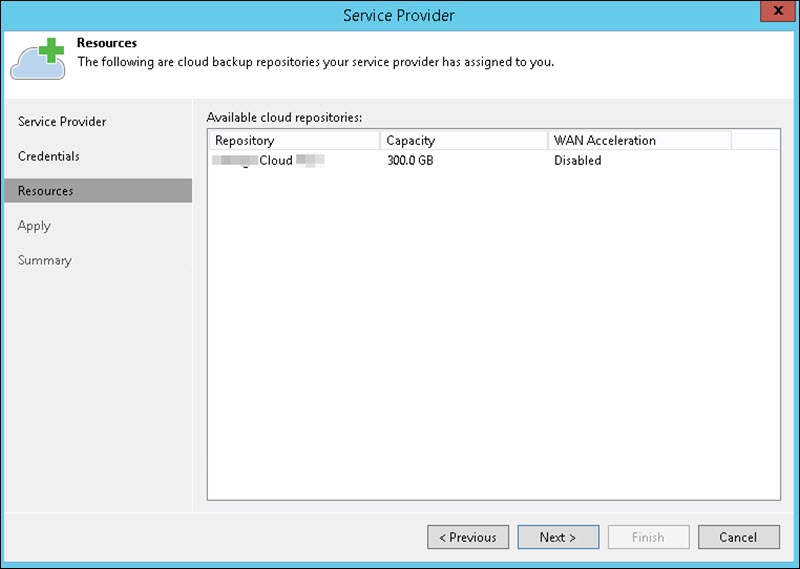
11. Click Next, and Veeam will try to connect to phoenixNAP. Once connected, you will see the list of available repositories.
12. Click Next one more time to advance to the Summary screen, where you will see the information about the configuration.
13. Click Finish, and your new phoenixNAP location will be available as a backup destination.
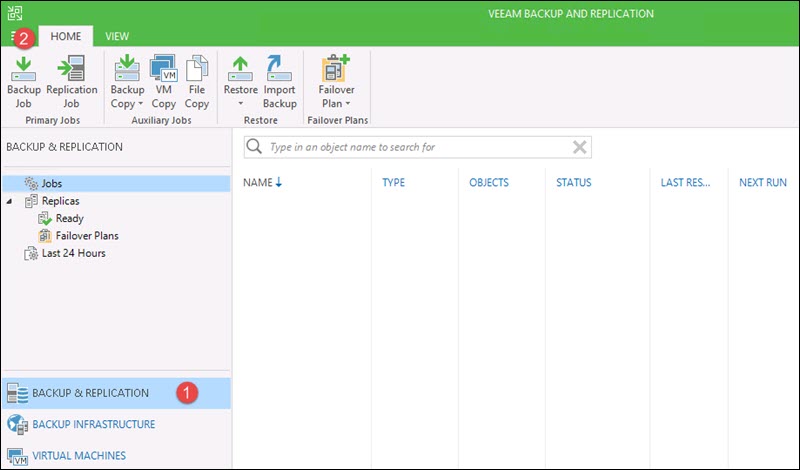
Add New Backup Job
To start a new backup job, open the Veeam Backup and Replication console and complete these steps:
1. Navigate to the Backup Infrastructure menu.
2. Click the Backup Job button to start the wizard.
3. Enter a Name and a Description in the respective fields and click Next.
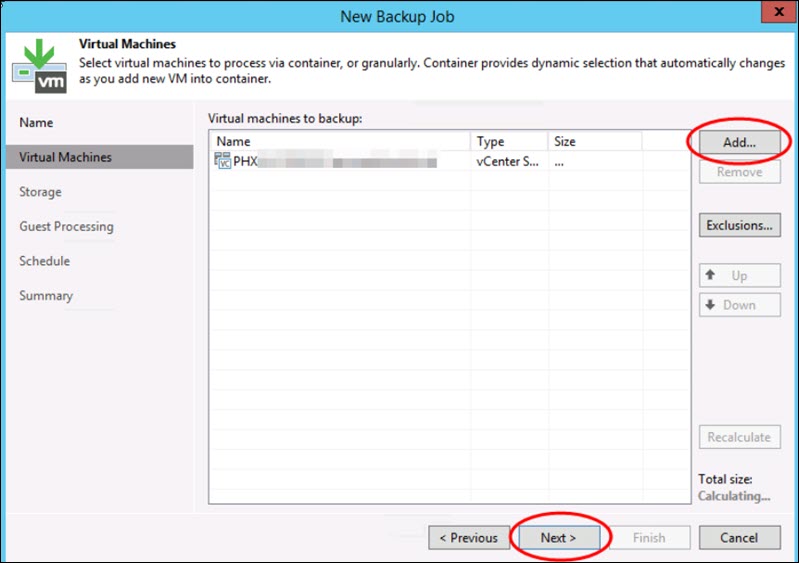
4. Click Add… to select a Virtual Machine you want to back up.
5. Click Next to advance to the 'Storage' step of the wizard.
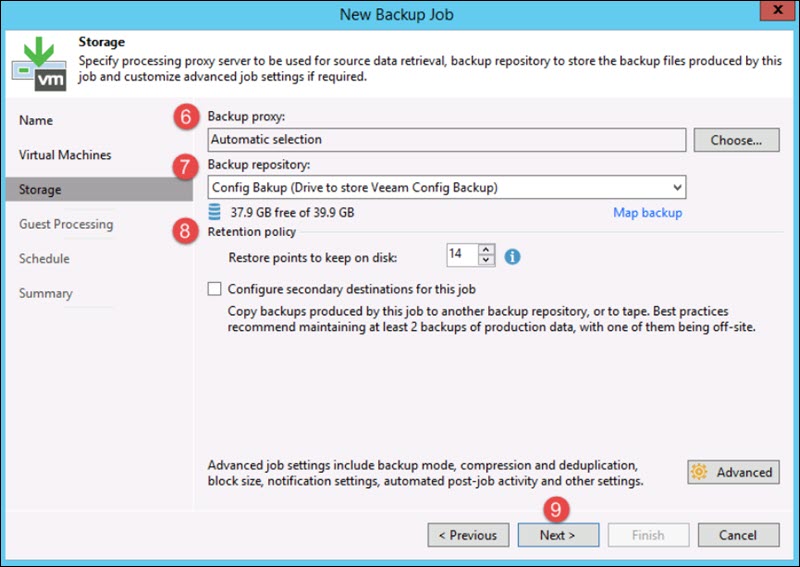
6. Use Automatic selection for Backup proxy settings.
7. Select phoenixNAP as a backup destination in the Backup repository list.
8. Adjust the Retention policy settings if needed.
9. Click Next to adjust further settings to your preference before completing the wizard.
Conclusion
By following this guide, you have successfully added phoenixNAP as a service provider and created your first backup job.