Formatting a USB drive prepares it for different file systems and ensures compatibility across various platforms. In Linux, formatting a USB requires knowledge of the commands and tools for managing storage devices.
In this tutorial, you will learn how to format a USB drive in Linux using three methods.
Prerequisites
- A system running Linux.
- A USB drive.
- Access to the terminal (Ctrl + Alt + T).
- A user account with root privileges.
Which File System to Use for USB Formatting?
The file systems you can use for formatting a USB drive differ by maximum file size and operating system compatibility. The most commonly used file systems when formatting a USB drive are:
- FAT32.
- NTFS.
- exFAT.
- UDF.
Their main features and differences are in the following table:
| File System | Supported File Size | Compatibility | Ideal Usage |
|---|---|---|---|
| FAT32 | up to 4 GB | Windows, macOS, and Linux. | For maximum compatibility. |
| NTFS | 16 EiB - 1 KB | Windows, macOS (read-only), and most Linux distributions. | For internal drives, Windows system files, and large files. |
| exFAT | 16 EiB - 1 KB | Windows, macOS, and Linux (requires extra drivers to access). | For files larger than 4 GB. |
| UDF | 16EiB - 1KB | Windows, macOS, and Linux. | For maximum compatibility when transferring large files. |
Important: Formatting a USB drive erases all data stored on it. To prevent data loss, always back up your data before formatting. Although some data may be recovered from a formatted USB stick, it depends on the formatting method used, the extent of data overwriting during formatting, and the effectiveness of data recovery tools.
If the stick contains sensitive information you want to erase, employ additional measures such as secure deletion or disk encryption.
How to Format a USB Drive in Linux
The following tools can be used to format a USB drive in Linux:
- The terminal
- Disk Utility
- GParted
The sections below outline the steps for each tool.
Method 1: Format USB Using the Terminal
The terminal is the easiest and fastest way to format a USB drive in Linux. The procedure consists of three steps:
1. Locating the USB drive.
2. Unmounting and formatting the USB drive.
3. Verifying the process was successful.
Follow the instructions below to format a USB drive using the terminal.
Step 1: Locate USB Drive
Open the terminal and run the following command:
dfThe terminal prints out a list of all mounted partitions and relevant information: used space, available space, used space percentage, and the path.
Locate the USB in the list and find the corresponding device. In this example, the USB drive is /dev/sdb1:
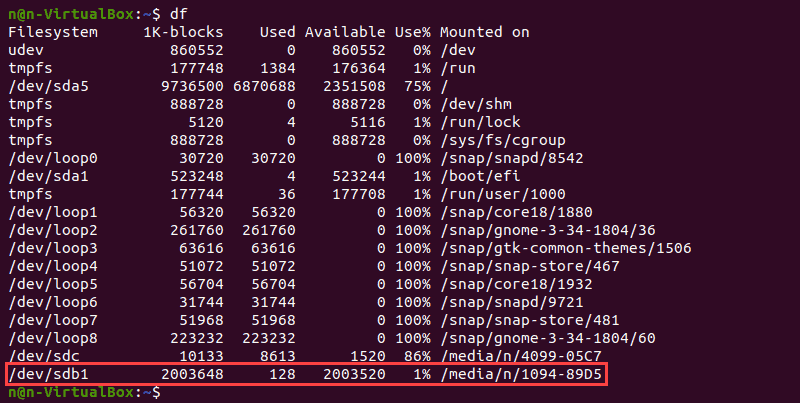
Note: If you are unsure of the drive designation, unplug the USB drive temporarily before running the df command again. The device that is now gone from the list is your USB device. You can also spot it by inspecting the total drive capacity.
Step 2: Unmount and Format USB Drive
Unmount the USB drives before formatting. To do so, use the following command:
sudo umount /dev/[device_name]Replace [device_name] with the USB device name found in the previous step. For example:

After unmounting, format the USB drive by running a command or using a Bash script.
Format Using a Command
Use one of the commands below to format the USB drive. Depending on your preferred file system, choose one of the following:
- FAT32:
sudo mkfs.vfat /dev/[device_name]- NTFS:
sudo mkfs.ntfs /dev/[device_name]- exFAT:
sudo mkfs.exfat /dev/[device_name]Format Using a Bash Script
Create a Bash script to simplify formatting USB drives that require frequent formatting. Using a script is simpler than memorizing Linux commands - just run the script to format the drive. Note that the following script works only with UDF.
Follow the steps below:
1. Run the command below to install the prerequisite packages for running the script:
sudo apt install udftools coreutils vim-common2. Using a web browser, navigate to the script GitHub page and download the Bash script.
3. Make the script executable using chmod:
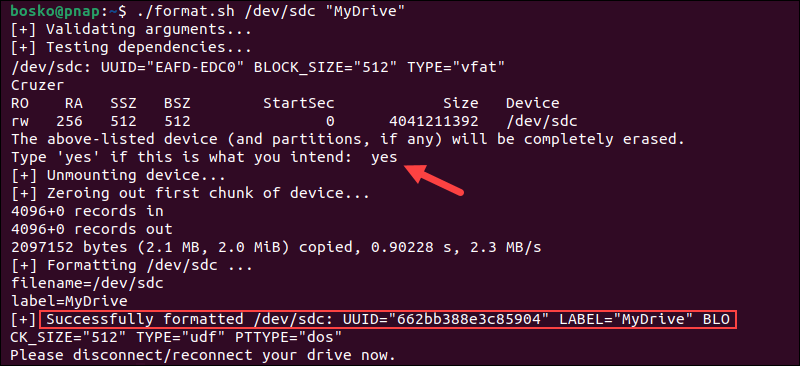
chmod +x format-udf.sh4. Run df to find your USB device name. Use the syntax below to format the device:
./format-udf.sh /dev/[device_name]For example:
Step 3: Verify USB Drive Formatting
Confirm the formatting process has been completed successfully with the following command:
sudo fsck /dev/[device_name]
A USB drive with no files indicates successful formatting:
Method 2: Format USB Using Disk Utility
The GNOME Disk Utility is a GUI tool for partitioning and formatting storage drives in Linux. Follow the steps below to format a USB drive using the Disk Utility tool.
Step 1: Open Disk Utility
To open the Disk Utility:
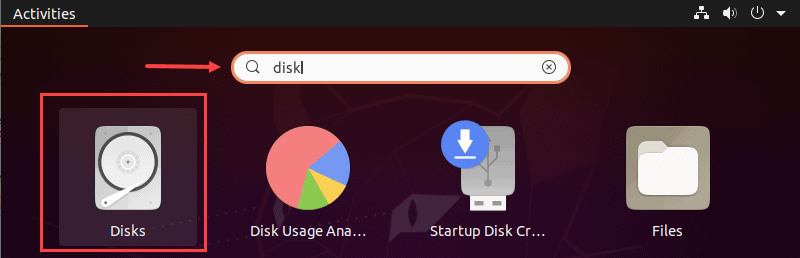
1. Launch the Application menu.
2. Type "disk" in the search bar.
3. Click the Disks icon.
Step 2: Identify the USB Drive
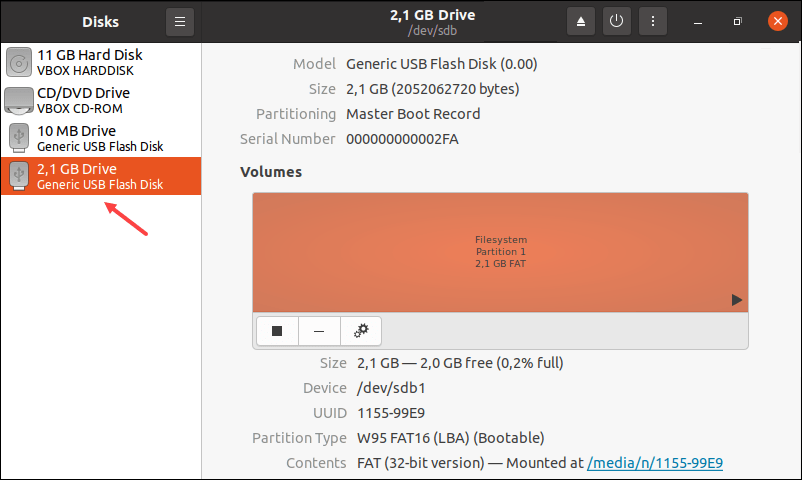
Locate the USB drive from the left panel and select it. The right panel contains drive details, such as the model name, size, serial number, and contents.
Step 3: Format the USB Drive
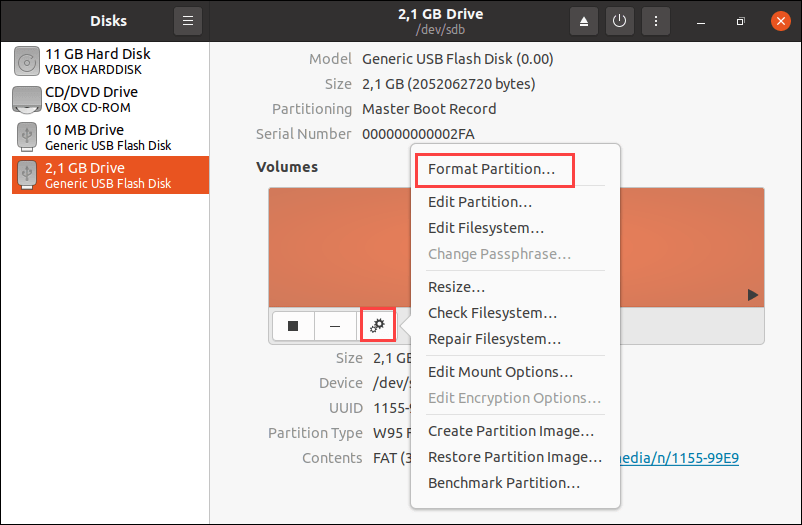
1. Click the gear icon and select the Format Partition option from the drop-down menu.
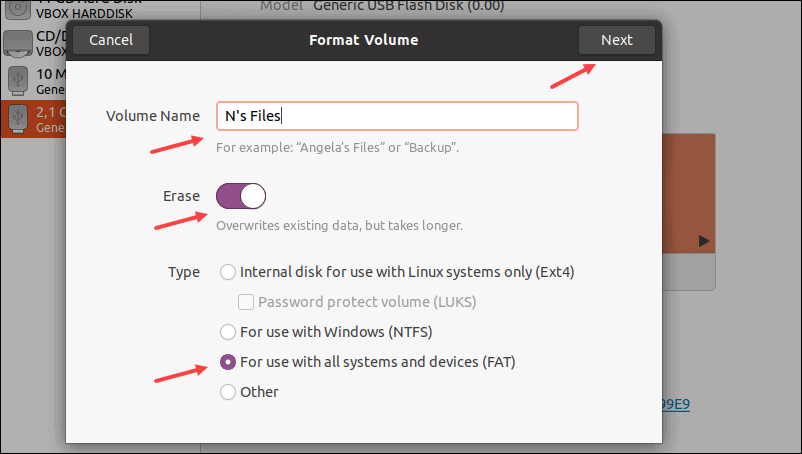
2. Type the preferred name for the USB drive. Optionally, enable the Erase option to overwrite the existing data from the USB drive. Choose the file system type and click on the Next button.
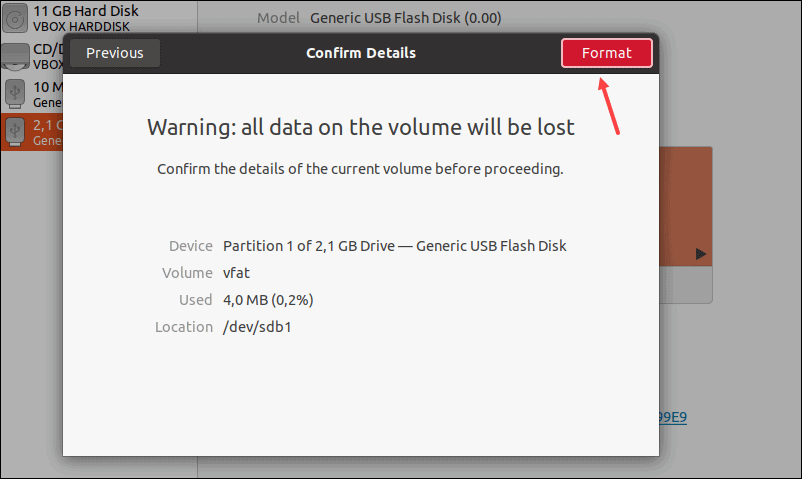
3. A pop-up appears with a warning message about data deletion and formatting details. Click the Format button to start the formatting process.
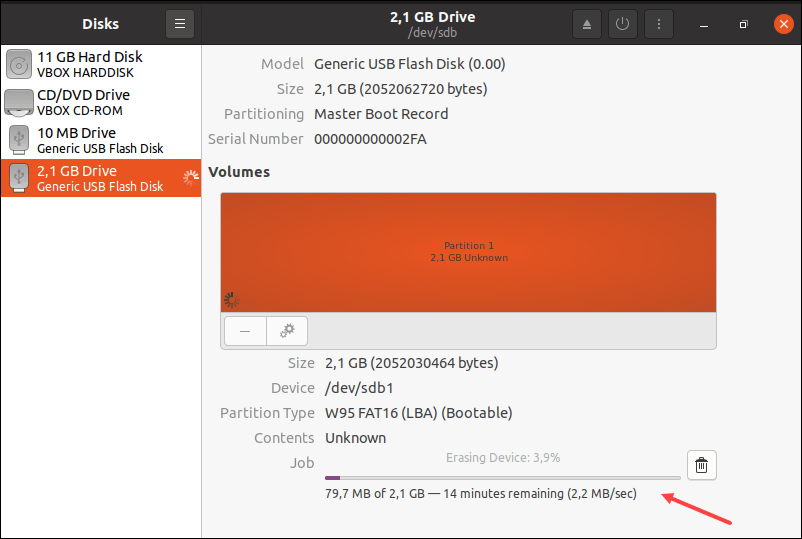
4. The progress line shows the remaining time until the formatting is completed. When the job is complete, close Disk Utility.
Method 3: Format USB Using GParted Tool
Formatting via GParted takes the most time as it involves an additional step – installing the tool. However, it is a handy tool you can use even after formatting the USB drive.
Follow the steps below to format a USB drive using the GParted tool.
Step 1: Install GParted Tool
1. Open the terminal and install the GParted tool:
sudo apt install gparted -y 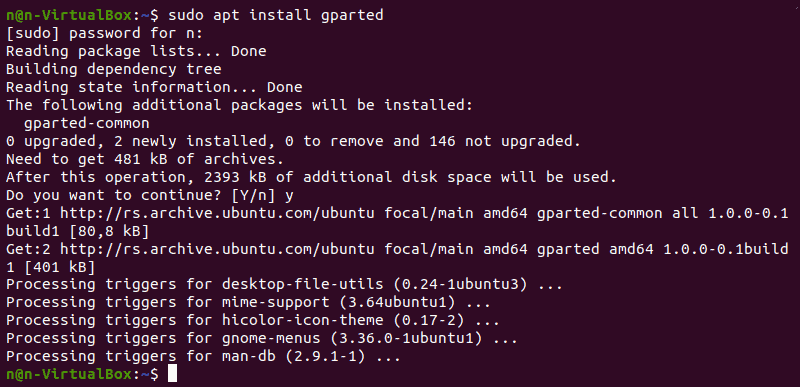
Wait until the process is complete.
2. Run GParted with:
sudo gpartedThe terminal opens the GParted program.
Step 2: Select the USB Device and File System
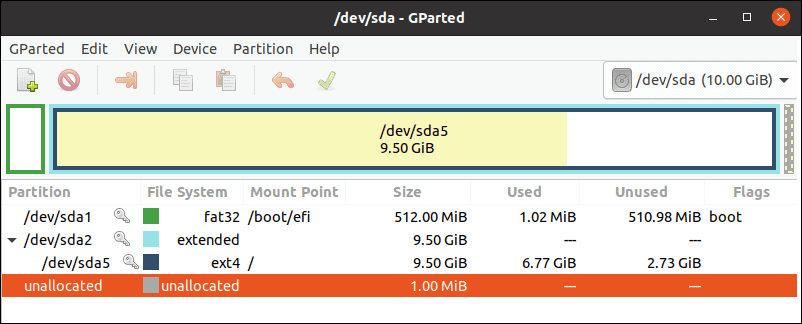
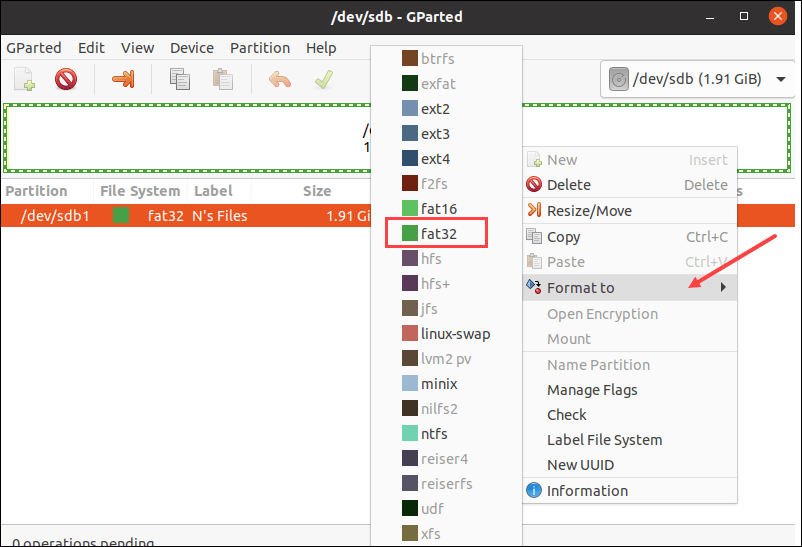
1. Select your device from the drop-down menu at the top of the GParted home screen.
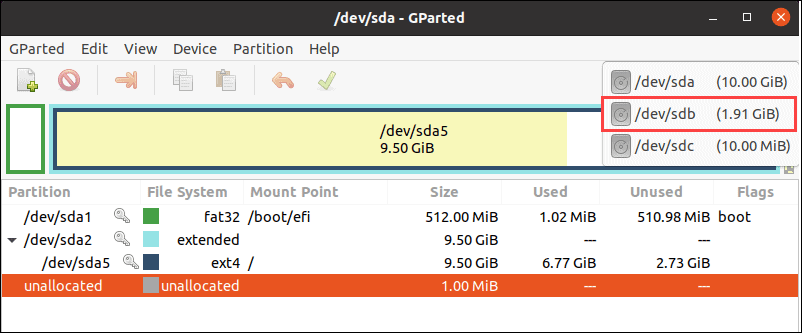
2. Right-click the partition and select Format to. Choose the preferred file system from the list to continue.
Step 3: Start the Process
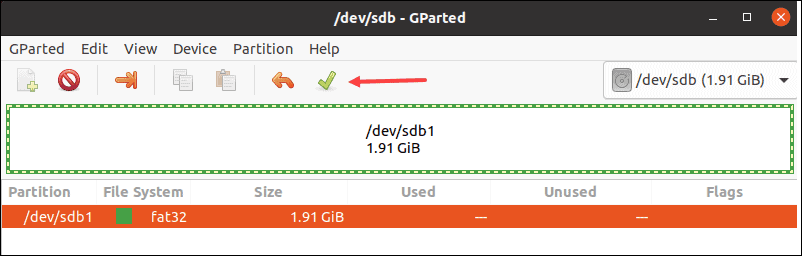
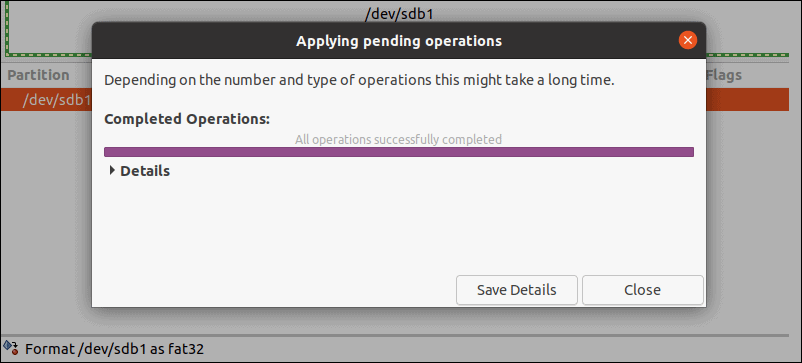
1. Click the green checkmark button to apply all operations.
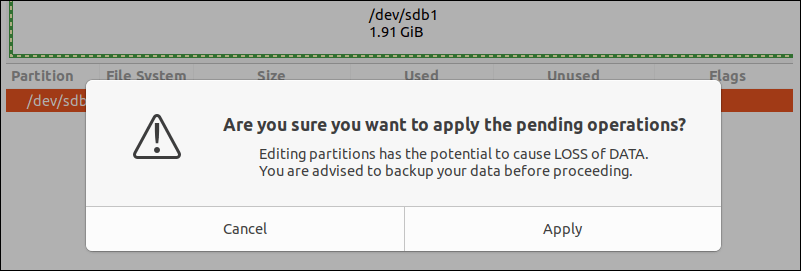
2. A pop-up appears with a warning message about data deletion. Click Apply to continue.
The GParted program formats the drive. The time required for the formatting process varies depending on the size and type of the USB drive.
3. Click the Close button to exit the menu when the operation completes.
How to Wipe USB on Linux
When you format a device, the system creates a new partition, but the original data can remain on the device until it is overwritten with new data. Some advanced recovery tools make data retrieval from formatted devices possible, which can be a severe problem when working with sensitive data.
This section shows how to completely wipe a USB stick and prevent any data from being recovered. Follow the steps below:
1. Locate the device by running the command below:
df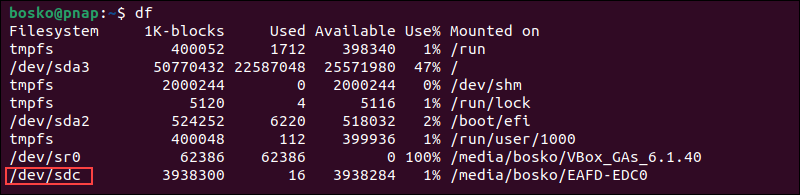
Locate your device in the output based on its name or storage size.
2. Unmount the device using the syntax below:
sudo umount /dev/[device]Replace [device] with your device name.
3. Use the dd command to overwrite the USB drive with zeroes. The syntax is:
sudo dd if=/dev/zero of=/dev/[device] bs=4096 status=progressFor example:

Important: Make sure to specify the correct device name. If you provide a wrong device name, you risk destroying data on other partitions, such as the hard drive.
The command overwrites the USB drive with zeroes. A zero overwrite is usually sufficient. However, if you want to ensure no data is recoverable from the device, overwrite the drive with random data instead of zeroes. The syntax is:
sudo dd if=/dev/urandom of=/dev/[device] bs=4096 status=progressNote: Another way to destroy data on a device is to use the shred command.
How to Recover Data From Formatted USB
If you formatted your USB drive and lost important data, you can attempt to recover it. Different data recovery tools can rescue data if it has not been overwritten. This section lists two methods for recovering deleted data.
Recover Data Using photorec
photorec is part of the testdisk utility, an open-source CLI data recovery tool that helps users recover data from lost or deleted Linux partitions. It can also be used to recover non-bootable partitions caused by deleting partition tables or by a cyber attack. Follow the steps below to recover files using photorec:
1. Update the system package repository information to ensure you install the latest testdisk version. Run:
sudo apt update2. Install testdisk by running the command below:
sudo apt install testdisk3. After completing the installation, start the photorec utility as an administrator by running the following in the terminal:
sudo photorec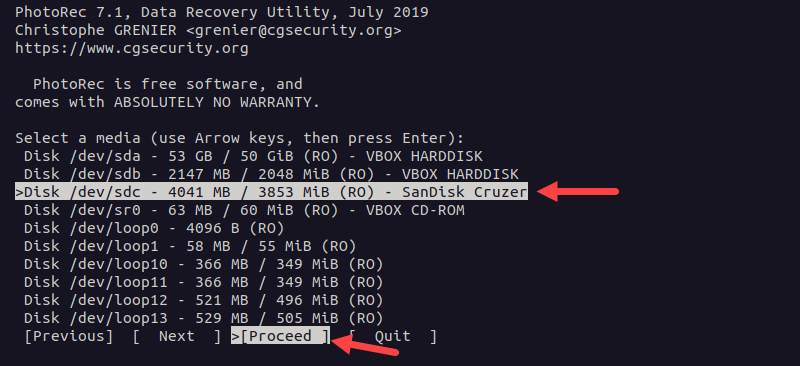
The tool starts in interactive mode, first prompting you to select the disk drive you want to scan for lost data. Use the up and down arrow keys to select the disk and the right arrow key to move the highlight to Proceed. Press Enter to confirm your selection.
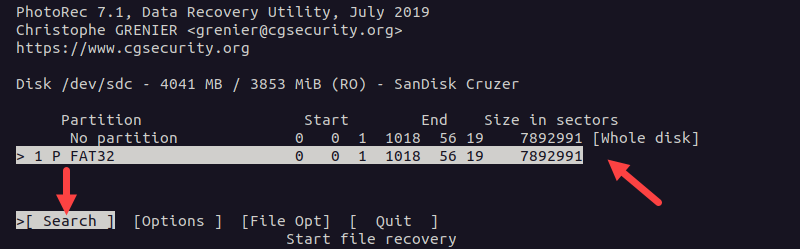
4. Use the arrow keys to select the partition on the disk you want to scan or select the whole disk, and press Enter to confirm:
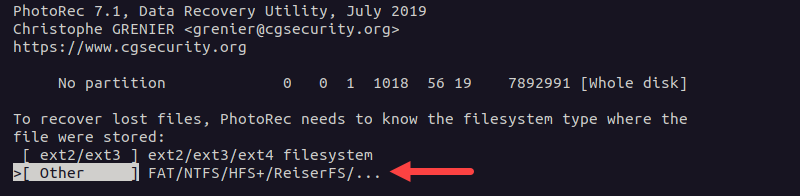
5. Select the filesystem type on the drive on the next screen. Make sure to select the appropriate one so that photorec knows which recovery method to use:
6. Use the arrow keys to select the destination in which to save the recovered files:
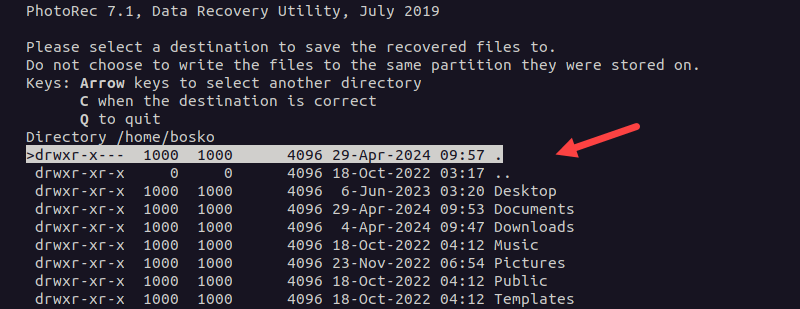
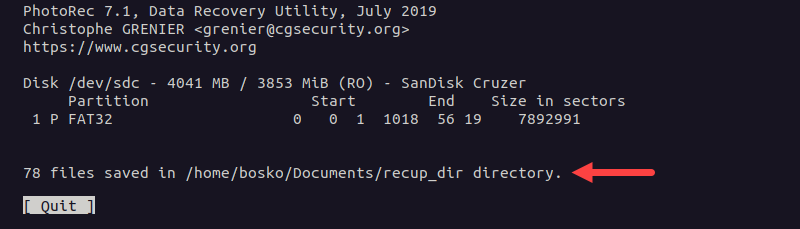
Confirm the directory with c and the app scans the drive for deleted files. When the process completes, the recovered files are saved in the directory you selected in the previous step:
Restore Data Using foremost
foremost is an open-source tool that allows users to recover deleted files from a hard drive, memory card, USB, and other types of memory devices. Follow the steps below to install foremost and recover deleted files from a USB:
1. Update your package repository information:
sudo apt update2. Install foremost by running the following command:
sudo apt install foremost3. Insert your USB stick and run the df command to find and copy the device path:
df4. After copying the device path, use the syntax below to scan the device for deleted files:
sudo foremost -i [device_path]Replace [device_path] with the path to your USB device you noted in the previous step. By default, foremost creates a directory named output inside the directory it was launched from and uses it as the target destination for recovered files.
Within that directory, foremost creates a subdirectory for each supported file type it retrieves from the drive. If you want to save the files to a different location, specify the -o flag, followed by the destination path.
If you want to retrieve only specific file types, use the -t flag followed by the file type. For example, to recover only .jpg files, enable verbose mode (-v) to see the process details and save the files to a custom output. Use a command like the one below:
sudo foremost -t jpg -v -i /dev/sdc -o /home/bosko/recovered_files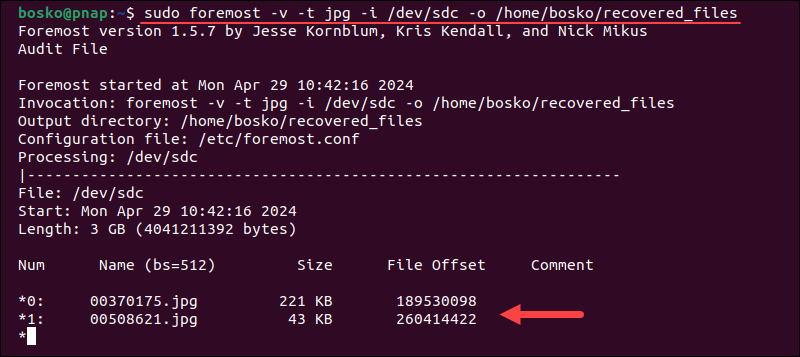
Conclusion
This article showed how to format a USB drive in Linux using several methods, and different ways to wipe a USB clean or retrieve deleted data from a USB device. Whatever your case, follow the steps outlined in this tutorial to simplify USB management.
Next, see how to mount a Linux partition or learn about swap partitions.