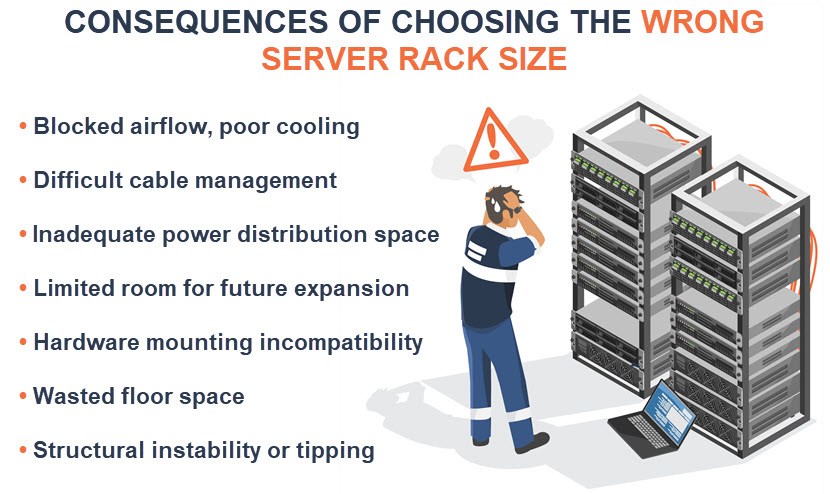
Choosing the right server rack size is more than just ensuring your equipment fits. Rack size influences how many servers you can deploy, which models you can use, and how much room you'll have for cabling, power distribution, and cooling. A well-chosen rack also makes future hardware upgrades far easier.
Because rack size matters so much, it's vital that IT teams have a clear understanding of available server rack sizes and know how to choose the one that best fits their server room.
This article breaks down the most common server rack sizes and helps you identify the right fit for your space. Whether you're outfitting a small IT closet or planning a full-scale data center, the information below will help you make informed decisions about rack sizing.
Struggling with overheating servers, tangled cables, or underutilized space? Check out our guide to server room design for some valuable guidance, plus read our server management article to learn how IT teams tackle the most common server-related challenges.
What Are Rack Units (U)?
A rack unit (abbreviated as U, less often as RU) is a standardized unit of measurement used to describe the height of equipment designed to be mounted in a 19 or 23-inch-wide server rack. One rack unit (1U) equals 1.75 inches (44.45 millimeters). If a piece of equipment is described as 2U, it is 3.5 inches (2 × 1.75") tall; 4U equipment would be 7 inches tall.
Rack units are the primary way to measure the height of server racks and the amount of equipment they can hold. For example, a 42U rack can accommodate equipment with a total height of 42 rack units.
IT teams use this standardized sizing system to assess how much hardware can fit neatly and securely into a rack enclosure. Here are a few examples of industry-standard sizes for rack-mounted hardware:
- PDUs (Power Distribution Units) are usually 1U in size.
- Network switches are commonly 1U-sized, although high-density or modular switches can be in the 2U+ territory.
- Patch panels are commonly 1U or 2U in size.
- Cable managers (horizontal or vertical units used for neat cabling) are typically 1U or 2U in size.
- Rack servers are commonly 1U to 4U in size (larger 3U or 4U units are often used for storage-heavy or GPU-intensive tasks).
- UPS (Uninterruptible Power Supply) units are commonly 2U to 6U in size.
- Storage arrays can range from 2U to 6U or more.
While rack units are considered maximum dimensions, most rack-mountable devices are slightly smaller than their nominal U size. For example, a 2U device may actually measure around 3.44 inches rather than the full 3.5 inches. This small margin allows for easier installation and improved airflow between devices.
Standard Server Rack Sizes
While 42U racks are the most common in enterprise environments, various other sizes are available to suit different use cases, from small offices to high-density data centers.
The table below outlines standard server rack sizes based on current industry norms:
| Server Rack Size | Height (U) | Height (inches) | Width (inches) | Depth (inches) | Common Use Cases |
|---|---|---|---|---|---|
| 12U | 12U | 21" | 19" or 23" | 24"–36" | Small office setups, wall-mounted racks |
| 24U | 24U | 42" | 19" or 23" | 24"–36" | Small to mid-size network closets |
| 27U | 27U | 47.25" | 19" or 23" | 24"–36" | Compact telecom or branch office use |
| 42U | 42U | 73.5" | 19" or 23" | 36"–42" | The most common full-height rack in enterprise data centers |
| 45U | 45U | 78.75" | 19" or 23" | 36"–48" | High-density server deployments |
| 48U | 48U | 84" | 19" or 23" | 36"–48" | Enterprise-scale deployments, built-in headroom for growth |

Custom Server Rack Sizes
Custom server racks are non-standard enclosures built to meet specialized needs beyond typical 12U-48U sizing and standard 19" width. IT teams can customize the following features of a rack:
- Height, width, and depth (e.g., to fit unusual equipment or tight spaces).
- Form factor (e.g., wall-mounted, open-frame, mobile, or enclosed).
- Integrated systems for cooling, power distribution, and cable management.
Custom racks typically involve higher costs and longer lead times than off-the-shelf options. However, custom server racks are vital in the following scenarios:
- In tight or irregular spaces where standard-sized racks can't physically fit, such as beneath desks or in shallow closets.
- When housing oversized or non-standard equipment that exceeds the typical width, depth, or height of conventional racks.
- In edge computing deployments that require compact or portable enclosures.
- In high-density environments where admins require deeper racks to manage airflow, cable routing, and power distribution.
- When teams must integrate specialized cooling systems (e.g., liquid immersion cooling or rear-door heat exchangers) into the rack design.
- In harsh environments that demand dustproof, weather-resistant, or shock-absorbing enclosures.
- In non-IT applications, such as audio-visual setups or industrial automation systems, where equipment doesn't conform to standard server rack sizes.
Most custom racks accommodate standard 19" rack-mount hardware (unless built for highly specialized gear). However, matching rail spacing, mounting depth, and ventilation is vital to ensure proper support and cooling.
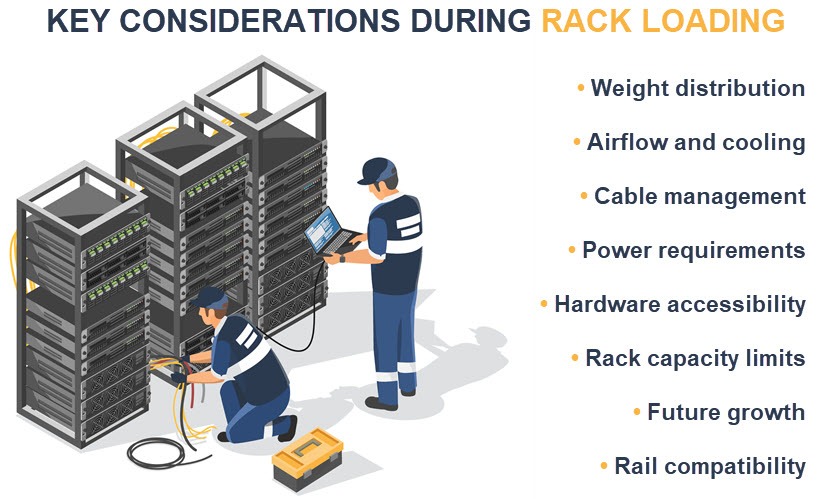
Rack Loading Considerations
Rack loading considerations refer to the key factors IT teams must account for when placing equipment inside a server rack. Below is a detailed look at the different factors you must consider to ensure the rack is structurally safe, thermally efficient, and functionally organized.
Weight Distribution
Weight distribution is a critical part of rack loading as it directly affects the rack's stability and safety.
If you place heavy equipment too high or unevenly, the entire rack can become top-heavy or unbalanced. Improper weight placement can strain mounting rails, warp the rack frame, and complicate maintenance.
Here are a few tips for distributing rack weight effectively:
- Install the heaviest equipment, like UPS units or battery arrays, at the bottom of the rack.
- Avoid mounting heavy gear on sliding or extended rails, as this mistake increases stress and the risk of tipping when pulled out.
- Use deep or full-depth shelves to support particularly heavy non-rackmount items.
- Keep a vertical balance by mixing lighter devices with heavier ones as you build upward.
- In multi-rack setups, distribute weight evenly across racks to prevent floor loading issues.
- Stay within the rack's rated static and dynamic load capacities.
- Anchor racks to the floor or wall in seismic zones or high-traffic environments to prevent tipping or shifting.
These practices keep the rack stable, easier to service, and safe for both the equipment and your in-house team. As an extra benefit, distributing weight properly makes cable routing and airflow management more straightforward.
Airflow and Cooling
Equipment generates a lot of heat, and if that heat isn't effectively removed, it can accumulate and reduce hardware lifespan.
Efficient rack cooling relies on unobstructed front-to-back airflow, and even small mistakes (e.g., leaving open rack units or misplacing high-heat equipment) can cause hot spots. Poor airflow can also force your cooling systems to work harder, which increases energy use and operational costs.
Here are a few tips on how to improve airflow during rack loading:
- Avoid mixing devices with different airflow directions (e.g., side-to-side vs. front-to-back).
- Place high-heat equipment where airflow is strongest (often near the center of the rack).
- Use vented shelves or spacer panels to improve circulation around dense or irregular gear.
- Ensure rear-door space is sufficient for exhaust air to escape freely.
- Use vertical cable organizers to keep airflow channels clear at the sides.
- Seal cable entry points and side gaps to maintain a consistent airflow path and avoid leaks or recirculation.
- Use temperature sensors or thermal monitoring tools to identify hot spots early.
- Consider rear-door heat exchangers or in-rack cooling units in high-density deployments.
As an extra precaution, always use blanking panels in any unused U spaces to prevent warm air from looping back through open slots.
Cable Management
Poorly routed cables can block ventilation paths, make hardware difficult to access, and increase the risk of accidental disconnections during service. Poor cable management also complicates troubleshooting, as unlabeled cables can turn a five-minute fix into an hour-long headache.
Here's what we suggest you do to improve cable management during rack loading:
- Use vertical and horizontal cable organizers to separate power and data lines.
- Label both ends of every cable for fast identification and tracing.
- Avoid tightly bundling cables and allow slack for airflow and future changes.
- Route cables along the sides or rear of the rack to keep the front clear.
- Color-code cables based on function or destination to simplify identification.
- Use velcro straps instead of zip ties to secure cables (velcro is reusable and won't pinch or damage cables).
- Use cables of appropriate length to avoid excess slack that can sag, snag, or block airflow.
- Implement strain relief for heavy or long cables to prevent stress on ports or plugs.
- Use rear cable trays, raceways, or ladder racks in larger setups to guide and support bulk cabling between racks.
Well-managed cables also make it easier to scale your infrastructure. Adding, removing, or replacing hardware becomes faster, safer, and less disruptive.
Power Requirements
Overloading a power distribution unit or failing to balance power loads across circuits can lead to breaker trips, unexpected shutdowns, or fire risks. Proper power planning during rack loading ensures that each device has reliable, redundant power while staying within the facility's electrical limits.
Here's what we recommend facility managers do to manage power requirements effectively during rack loading:
- Calculate the total power draw of all equipment before installation.
- Use redundant PDUs and connect critical devices to separate power sources (A/B feeds).
- Balance the load across available circuits to avoid overloading any single leg.
- Match plug types, amperage, and voltage between devices and PDUs to avoid compatibility issues or safety risks.
- Leave 20–30% headroom in total power capacity to account for future growth, startup surges, or unexpected load spikes.
- Plan UPS placement and capacity as part of the rack loading process and ensure it can support the rack's power load for the desired runtime.
- Document power paths and load distribution to simplify audits, troubleshooting, and future upgrades.
Many modern PDUs can track usage and send warnings before an issue escalates. Use these PDUs to help the IT team act before power-related issues lead to downtime.
Check out our guide to data center power monitoring to see how the pros track power consumption and prevent costly disruptions.
Hardware Accessibility
When facility managers cram devices without consideration for reach or clearance, even simple tasks (e.g., replacing a failed drive or checking cable connections) become frustrating and time-consuming. Cluttered racks also increase the risk of accidental unplugging or hardware damage during servicing.
Here's what you can do during rack loading to ensure critical rack components are easy to reach:
- Leave 1U gaps between densely packed components to improve reach and airflow.
- Mount frequently serviced equipment (like KVMs or storage arrays) at waist-to-chest height.
- Use hard-to-reach zones for passive or rarely serviced components.
- Use sliding rails or shelves for heavy devices to allow front or rear access.
- Bundle and route cables to avoid blocking access to key ports and fasteners.
- Reserve some U space or side clearance for future hardware, upgrades, or tools.
Prioritizing access benefits not just technicians during their day-to-day tasks. Good accessibility reduces mean time to repair (MTTR), speeds up audits, and helps prevent unplanned downtime caused by rushed or difficult maintenance work.
Rack Capacity Limits
Server racks have both static (stationary) and dynamic (in motion) weight ratings. Ignoring either of those limits can lead to physical failures, especially during rack relocation or reconfiguration.
Capacity also includes spatial limits. Trying to fit more devices than the rack can reasonably handle can choke airflow and make cable management nearly impossible.
Here's a list of the best practices that enable IT staff to stay within the rack capacity limits:
- Check the rack's weight capacity and load to no more than 80–85% of the rated capacity.
- Avoid cramming gear just because there's sufficient physical space, and remember to leave room for airflow and cables.
- Follow the manufacturer's guidelines for how to distribute weight within the rack.
- Choose a rack depth and width that comfortably fits your largest equipment.
- Monitor usage with sensors to spot capacity issues early.
Understanding rack limits helps you plan infrastructure that lasts. It also dictates how well your racks support scaling, upgrades, and shifts in workload over time.
Future Growth
It's easy to focus on current needs when loading a rack, but server rooms rarely stay static. If your rack is filled to capacity from day one, upgrades will be disruptive, costly, or even impossible without replacing the entire enclosure.
Leaving room (physically and electrically) for growth helps your infrastructure scale gracefully. Here's how to accommodate future growth in your rack layout:
- Leave extra U space for additional servers, switches, or accessories.
- Use consistent hardware sizes and layouts to make it easier to swap or add equipment later.
- Overspec PDUs to handle more devices later without replacement.
- Use adjustable rails and shelves to support mixed form factors as needs evolve.
- Reserve cable routing space and labeling schemes for future expansion.
- Choose deeper racks or taller enclosures (e.g., 45U or 48U) if there is sufficient space in your server room.
- Document your current rack layout and cable maps to make future upgrades faster and less error-prone.
Planning for growth is also vital to avoiding technical debt and ensuring you have a sufficiently agile infrastructure that can keep up with your business needs.
Rail Compatibility
Not all mounting rails or slide kits fit every rack, even if the dimensions seem standard. Differences in rack depth, rail types (fixed vs. sliding), and hole spacing (square, round, or threaded) can cause major installation issues if overlooked.
Using incompatible rails can result in poor support, increased strain on mounting points, or even hardware falling out of alignment during operation or maintenance. Here's how to avoid rail compatibility issues when loading your rack:
- Match the rail type (e.g., tool-less, cage nut, threaded) to the rack's mounting holes.
- Standardize on one rack vendor or model line to reduce mounting mismatches across racks.
- Confirm that the rail's adjustable depth range matches the rack's depth.
- Check that the server and rail kit are rated for the rack's width and mounting pattern.
- Avoid mixing brands unless officially listed as cross-compatible.
- Document which rails and brackets go with which equipment.
- Test-fit new rails or check manufacturer compatibility charts before large deployments.
- Keep spare mounting hardware kits (e.g., cage nuts, screws, adapters) on hand to solve compatibility issues on the fly.
Getting rail compatibility right also prevents headaches during maintenance, especially when swapping or upgrading hardware in a live environment.
Inside vs. Outside Rack Depth
Outside rack depth refers to the total physical depth of the rack enclosure from front to back, including the frame, doors, and any protruding handles or cable management arms. This measure is important for determining whether the rack can physically fit in the available space.
On the other hand, the inside rack depth refers to the usable interior space between the front and rear mounting rails. This measure determines the depth to which your equipment can be submerged.
Outside and inside depths are not identical, and assuming they are often leads to serious deployment issues. For example, a rack may be listed as having an outside depth of 36 inches, but the inside (i.e., usable) depth might only be 28 inches, which is too shallow for many enterprise-grade servers and UPS units that are 28 to 36 inches deep.
The table below presents the typical depth ranges:
| Rack Type | Outside Depth (inches) | Inside Depth (inches) | Use Cases |
|---|---|---|---|
| Shallow | 18–24" | 14–20" | Best for patch panels, switches, or light-duty equipment |
| Mid-Depth | 28–36" | 24–30" | Common in SMB server rooms and telecom racks |
| Full-Depth | 42–48" | 36–42"+ | Standard for modern servers and dense deployments |
Here are a few quick tips when considering rack depths:
- Always check both inside and outside depth when purchasing a rack.
- Leave at least three to five inches of clearance behind the deepest device to ensure proper cable routing and airflow.
- If using cable management arms, factor in their added depth.
- Don't make the mistake of assuming rails or shelves will make up for depth limitations.
Understanding the difference between inside and outside rack depth prevents costly surprises and ensures your hardware installs cleanly, cools efficiently, and stays accessible.
Space Between Server Racks
Inadequate spacing between server racks often leads to overheating, cramped maintenance conditions, and cable congestion. On the other hand, sufficient spacing enables IT admins to:
- Support hot-aisle/cold-aisle configurations.
- Simplify servicing.
- Improve the long-term flexibility of the server room or data center layout.
The ANSI/BICSI 002 and ASHRAE TC 9.9 standards offer widely accepted guidance on rack spacing in professional IT environments.
Here's a breakdown of key spacing dimensions:
| Aisle Type | Recommended Minimum Spacing | Purpose |
|---|---|---|
| Cold Aisle | 36" (91 cm) to 48" (122 cm) | Ensures unobstructed airflow into equipment intakes and front-side access |
| Hot Aisle | 36" (91 cm) | Prevents heat buildup and allows exhaust air to dissipate efficiently |
| Service Clearance (Rear) | 36" (91 cm) | Provides room for cable management, maintenance, and airflow |
| Side-to-Side (Rack to Rack) | 0–6" (0–15 cm) if adjacent | Supports lateral access and cooling for racks with side-facing airflow or cabling |
| Row-to-Wall Clearance | 24" (61 cm) | Allows rear access at the end of rows; supports airflow and service reach |
The numbers in this table are minimums. We recommend wider spacing in mission-critical or high-density environments, especially in cold aisles where multiple technicians may need to work simultaneously.
Know How to Choose the Right Server Rack Size
Server rack sizes affect everything from hardware compatibility and airflow to ease of maintenance and scalability. Proper planning and consideration can prevent costly mistakes and downtime in the future.
Use what you learned in this article to confidently select a rack that fits your available space, supports current equipment, and simplifies future server upgrades. Selecting the right rack also ensures optimal airflow, easy access for maintenance, and room for future expansion.