Next.js helps developers build fast, scalable, and interactive web applications with features that improve performance, SEO, and the overall user experience. It supports efficient development and flexible deployment across different hosting environments, including Linux servers.
This tutorial explains how to deploy a Next.js application on Ubuntu using three methods: PM2 with Nginx, Docker with Docker Compose, and systemd.
Prerequisites
- A system running Ubuntu 26.04 LTS.
- Access to the command line.
- Root privileges.
Step 1: Install Node.js
Next.js requires Node.js to build and run the application. Install Node.js 24 from the NodeSource repository to use a current Node.js release and make the runtime available system-wide. A system-wide installation also lets services such as systemd access the Node.js executable without extra environment configuration. Follow the steps below:
1. Update the package index:
sudo apt update2. Install the packages required to download the NodeSource setup script and work with the application:
sudo apt install -y curl git3. Add the NodeSource repository for Node.js 24:
curl -fsSL https://deb.nodesource.com/setup_24.x | sudo -E bash -4. Install Node.js and npm:
sudo apt install -y nodejs5. Verify the installed versions:
node -vnpm -v
6. Verify the installation paths:
which nodewhich npm
The commands should return the paths to the installed Node.js and npm executables.
Step 2: Create and Build the Next.js Application
After installing Node.js, create a Next.js application that serves as the deployment target for all three methods. Building the application before deployment verifies that the project and its dependencies work correctly in a production environment. Follow the steps below:
1. Create a new application:
npx create-next-app@latest nextjs-demoWhen prompted, type y and press Enter to confirm the installation, and press Enter again when prompted to use the recommended Next.js configuration.
You can also choose to customize settings to configure the application to your needs.
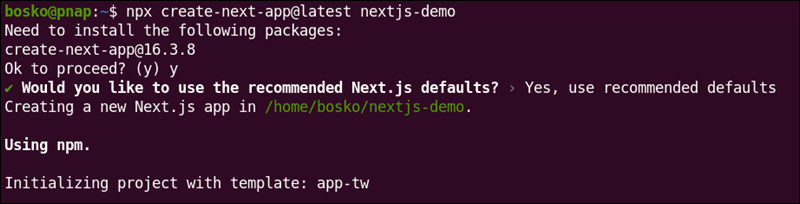
2. Change to the application directory:
cd ~/nextjs-demo3. Create an optimized production build:
npm run build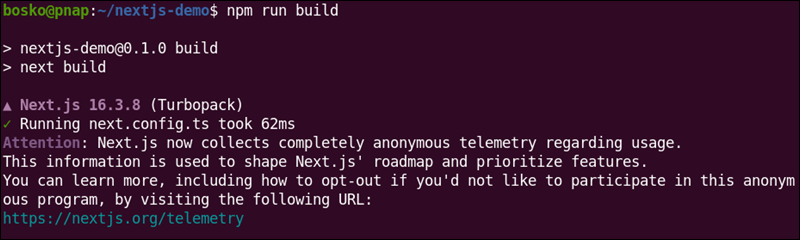
4. Start the application in production mode:
npm start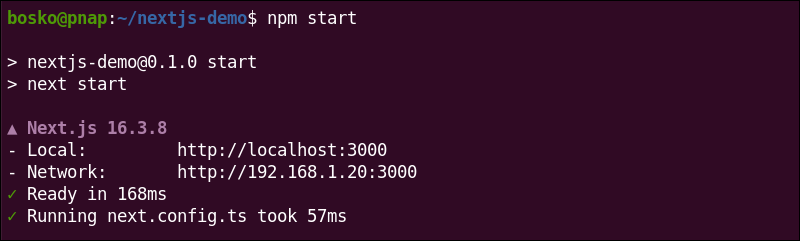
5. Verify that the application responds on port 3000:
curl http://localhost:3000The command returns the HTML generated by the Next.js application. You can also check if it works by visiting http://localhost:3000 in your web browser:
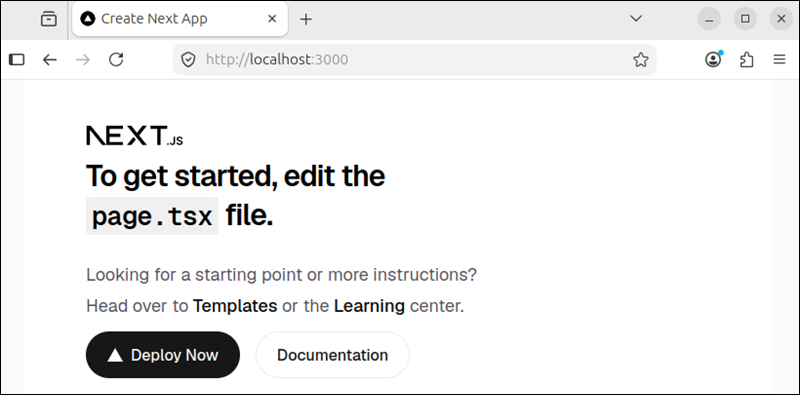
Stop the application with Ctrl+C before continuing.
Option 1: Deploy Next.js with PM2 and Nginx
PM2 runs the Next.js application as a managed background process, while Nginx acts as a reverse proxy for incoming HTTP requests. This setup provides process management and a dedicated web server that can handle client requests before forwarding them to the Next.js application.
Follow the steps below to deploy Next.js using PM2 and Nginx:
Step 1: Install PM2
PM2 manages the Next.js process independently from the terminal session and can restart the application when necessary. Installing it globally makes the pm2 command available system-wide.
Install PM2 with:
sudo npm install -g pm2
Verify the installation:
pm2 --versionStep 2: Build and start the application with PM2
PM2 should run the production version of the Next.js application rather than the development server. Create a production build and then use PM2 to manage the npm start process.
Create the production build:
npm run buildStart the application with PM2:
pm2 start npm --name nextjs-app -- startCheck the PM2 process status:
pm2 status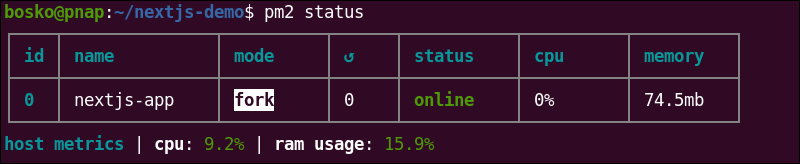
Verify that the application responds on its local port:
curl http://localhost:3000If it works, the output returns the HTML generated by Next.js.
Save the current PM2 process list so PM2 can restore the application after a system reboot:
pm2 saveStep 3: Install and configure Nginx
Nginx provides a reverse proxy in front of the Next.js application. Instead of exposing the application directly on port 3000, Nginx receives HTTP requests on port 80 and forwards them to the Next.js process.
Follow the steps below:
1. Install Nginx:
sudo apt install -y nginx2. Check the service status:
sudo systemctl status nginx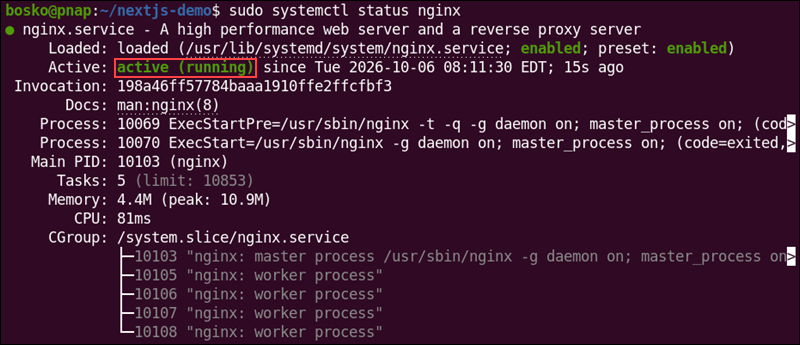
3. Create a dedicated Nginx configuration for the application:
sudo nano /etc/nginx/sites-available/nextjsAdd the following configuration:
server {
    listen 80;
    server_name localhost;

    location / {
        proxy_pass http://127.0.0.1:3000;

        proxy_http_version 1.1;

        proxy_set_header Host $host;
        proxy_set_header X-Real-IP $remote_addr;
        proxy_set_header X-Forwarded-For $proxy_add_x_forwarded_for;
        proxy_set_header X-Forwarded-Proto $scheme;
    }
}
Save and exit the file.
4. Enable the configuration:
sudo ln -s /etc/nginx/sites-available/nextjs /etc/nginx/sites-enabled/nextjs5. Remove the default Nginx site:
sudo rm /etc/nginx/sites-enabled/default6. Test the configuration before applying the changes:
sudo nginx -t
7. Restart Nginx to apply the changes:
sudo systemctl restart nginxStep 4: Verify the PM2 and Nginx Deployment
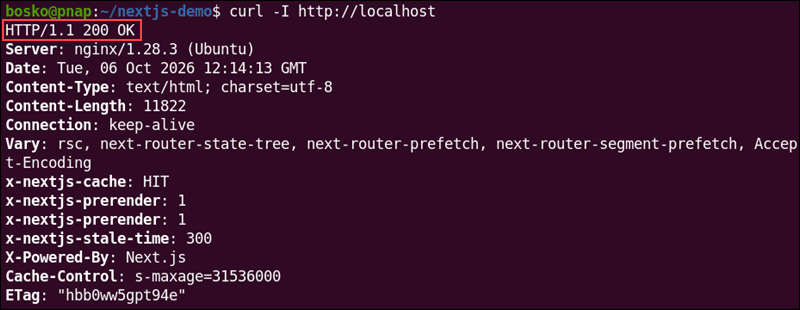
The final verification confirms that Nginx can receive requests and forward them to the Next.js application managed by PM2. A successful response from port 80 confirms that the reverse proxy is working.
Send a request through Nginx:
curl -I http://localhostA successful deployment returns an HTTP 200 OK response:
Option 2: Deploy Next.js with Docker and Docker Compose
Docker packages the Next.js application and its dependencies into an isolated container, while Docker Compose defines and manages the container configuration. This approach provides a consistent runtime environment and makes the application easier to move between systems.
Step 1: Verify the Docker Installation
Docker and Docker Compose must be available before you can containerize the Next.js application. Verify both installations before creating the container configuration.
Check the Docker version:
docker --versionCheck the Docker Compose version:
docker compose versionFollow our guide to install Docker if it isn't available on your system.
Step 2: Create the Docker configuration
The Dockerfile defines how Docker builds the Next.js application image, including the Node.js runtime, dependencies, and production build. A .dockerignore file prevents unnecessary project files from being copied into the image. Follow the steps below to create the Docker configuration:
1. Change to the application directory:
cd ~/nextjs-demo2. Create the Dockerfile:
nano Dockerfile3. Add the following:
FROM node:24-alpine

WORKDIR /app

COPY package*.json ./

RUN npm ci

COPY . .

RUN npm run build

EXPOSE 3000

CMD ["npm", "start"]
4. Create the .dockerignore file:
nano .dockerignore5. Add:
node_modules
.next
.git
.gitignore
Dockerfile
compose.yaml
npm-debug.log
Save the file and exit.
Step 3: Configure Docker Compose
Docker Compose defines how to build and run the Next.js container. The configuration maps host port 3000 to container port 3000 and restarts the container automatically unless you stop it explicitly.
Follow the steps below:
1. Create the Compose file:
nano compose.yaml2. Paste the following lines:
services:
  nextjs:
    build: .
    container_name: nextjs-app
    ports:
      - "3000:3000"
    restart: unless-stopped
Step 4: Build and Start the Next.js Container
Build the Docker image and start the container in detached mode. Docker Compose uses the Dockerfile to create the image and then starts the Next.js application inside the container.
docker compose up -d --buildCheck the service status with:
docker compose ps
Step 5: Verify Docker deployment
Verify that the containerized Next.js application responds on port 3000. Checking the listening port also confirms that Docker correctly publishes the application port on the host.
Send a request to the application:
curl -I http://localhost:3000A successful deployment returns an HTTP 200 OK response.
Option 3: Deploy Next.js Using systemd
systemd can run the Next.js application as a native Linux service without requiring a separate process manager or container runtime. Creating a dedicated service user and application directory also provides a controlled environment for running the application.
Follow the steps below to deploy Next.js with systemd.
Step 1: Create a Dedicated System User
Running the application under a dedicated system user limits the permissions available to the Next.js process and avoids running the application as root.
Create the nextjs system user and group:
sudo adduser --system --group nextjsVerify the user:
id nextjs
The output shows that the nextjs user has UID 112, belongs to group nextjs with GID 115, and has no additional group memberships.
Step 2: Prepare the Application Directory
The application needs a dedicated location outside the user's home directory so systemd can manage it as a system service. Copy the application files to /var/www/nextjs and assign ownership to the dedicated service user.
1. First, create the application directory:
sudo mkdir -p /var/www/nextjs2. Copy the Next.js application files to the directory we created in the previous step:
sudo cp -r . /var/www/nextjs/3. Assign ownership to the nextjs user:
sudo chown -R nextjs:nextjs /var/www/nextjsStep 3: Create the systemd Service
The systemd service definition specifies which user runs the application, where the application is located, which command starts it, and how systemd handles the process. The service uses the production environment and port 3000 defined for the Next.js application.
Create the service file:
sudo nano /etc/systemd/system/nextjs.servicePaste the following lines into the file:
[Unit]
Description=Next.js Application
After=network.target

[Service]
Type=simple
User=nextjs
Group=nextjs
WorkingDirectory=/var/www/nextjs
ExecStart=/usr/bin/npm start
Restart=on-failure
Environment=NODE_ENV=production
Environment=PORT=3000

[Install]
WantedBy=multi-user.target
Save the file and exit the editor.
Step 4: Enable and Start the Next.js Service
After creating a new systemd service, reload the systemd configuration so it recognizes the service definition. Enable the service to start automatically during system boot, then start it immediately.
Reload systemd with:
sudo systemctl daemon-reloadEnable the service:
sudo systemctl enable nextjssudo systemctl start nextjsCheck the service status:
sudo systemctl status nextjs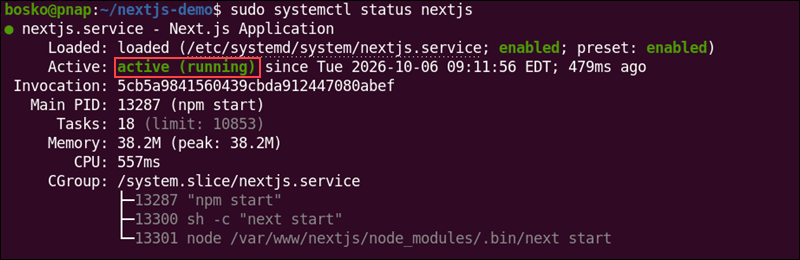
A successful service shows active (running) in the status output.
Step 5: Verify the systemd deployment
Verify that the systemd-managed application responds on port 3000. This confirms that systemd successfully started the Next.js production server and that the application is accepting connections.
Send a request to the application:
curl -I http://localhost:3000A successful deployment returns an HTTP 200 OK response.
Conclusion
This tutorial demonstrated three ways to deploy a Next.js application on a Linux server: PM2 with Nginx, Docker with Docker Compose, and systemd. Each method offers a different approach to process management and deployment, so you can choose a setup that fits your server environment and operational needs.
Next, see how to PrettyPrint a JSON File with Python.