


Claude Code is an AI-powered coding assistant that runs in the terminal. It analyzes codebases, edits files, runs commands, and helps automate development tasks through natural-language instructions.
This tutorial explains how to install Claude Code on a Linux system running Ubuntu using three different installation methods.
Prerequisites
- A machine running Ubuntu (we use a phoenixNAP Bare Metal Cloud server running Ubuntu 24.04 LTS, but the commands apply to Ubuntu 26.04 LTS as well).
- At least 4 GB of RAM.
- An eligible Claude subscription (Pro, Max, Team, or Enterprise) or an Anthropic Console account with API billing enabled.
Method 1: Install Claude Code Using the Native Shell Script
The native shell script is the recommended way to install Claude Code on Linux. It installs a standalone executable without requiring Node.js or a package manager. The installer also configures automatic updates, which reduces manual maintenance. This method installs Claude Code for the current user rather than system-wide.
Follow the steps below:
Step 1: Download and Run the Native Installation Script
The native installer downloads and installs Claude Code in the current user's home directory. Run the following command to start the installation:
# curl -fsSL https://claude.ai/install.sh | bashThe installer downloads the required files and places the Claude Code executable in ~/.local/bin/claude.
Step 2: Add the Claude Code Executable to PATH
The shell must include the Claude Code installation directory in the PATH environment variable to recognize the claude command. If the installer reports that ~/.local/bin is not in PATH, add the directory to the Bash configuration:
echo 'export PATH="$HOME/.local/bin:$PATH"' >> ~/.bashrc && source ~/.bashrc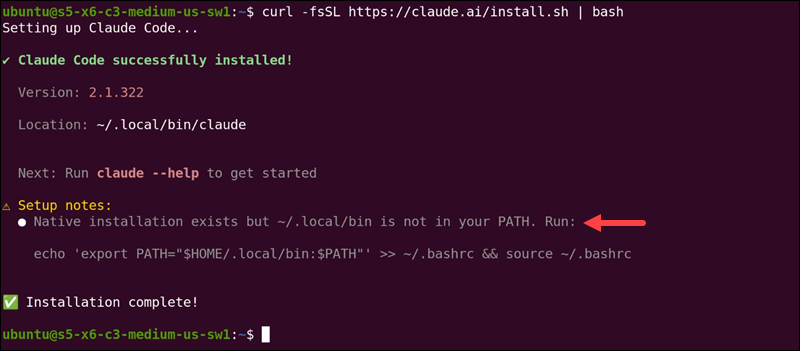
This step is only necessary if ~/.local/bin is not already in PATH and the installer asks for it. Ubuntu may configure this directory automatically.
Step 3: Verify the Claude Code Installation
After installation, verify that the shell can locate Claude Code and display its version. Run:
claude --version
The command displays the installed Claude Code version if the installation succeeds.
Run the diagnostic command to check the installation and identify potential configuration issues:
claude doctor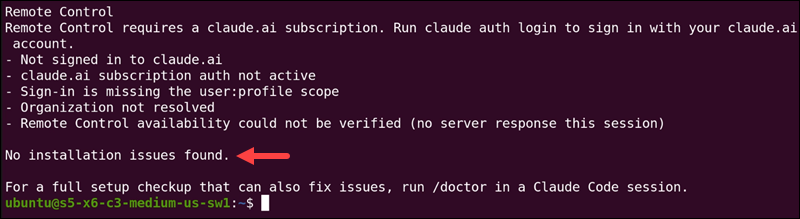
Step 4: Launch Claude Code and Complete Authentication
Launch Claude Code from the directory you want to work in. The CLI starts an interactive session and guides you through the initial setup.
Run:
claudeOn the first launch, Claude Code prompts you to select a terminal theme. Review the prompts and complete the initial setup.
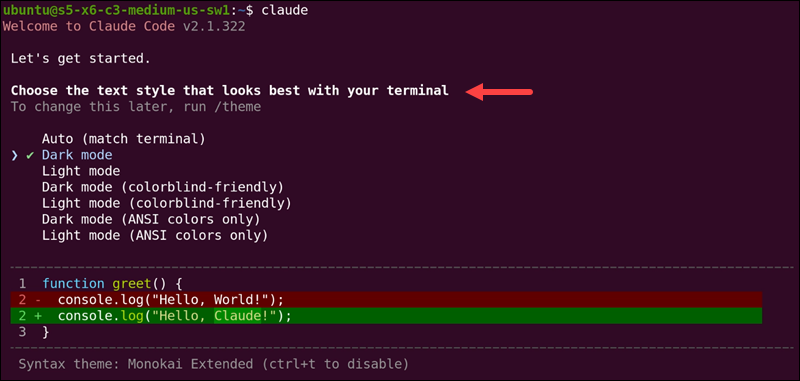
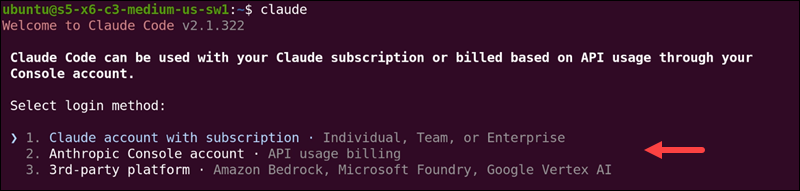
Next, authenticate using an eligible Claude account or an Anthropic Console account with API billing enabled. Follow the authentication instructions to complete the sign-in process.
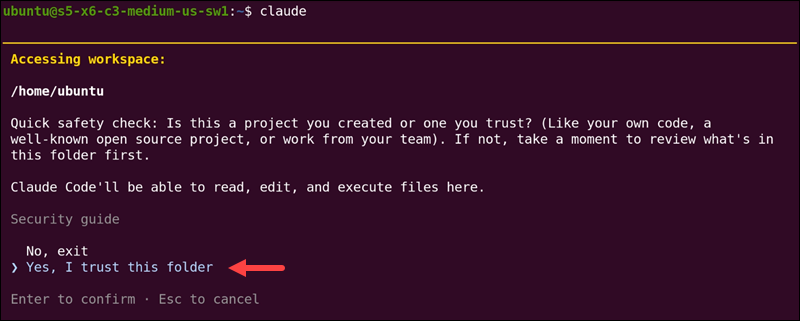
After authentication, confirm whether you trust the current working directory:
Claude Code is ready to use after you complete the prompts. Enter natural language instructions in the terminal to interact with the assistant.
To close the interactive session, run:
/exitMethod 2: Install Claude Code Using the Official APT Repository
The APT installation method is suitable for users who prefer managing software through Ubuntu's package manager. It integrates Claude Code with the system's package management workflow and supports standard package updates. However, this method requires administrator privileges and additional repository configuration. Unlike the native installer, APT installations do not update automatically through Claude Code.
Follow the steps below to install Claude Code using APT:
Step 1: Install the Required Packages
The APT installation process uses curl to download the repository signing key and gpg to verify it. Install these utilities if they are not already available:
sudo apt install curl gnupgStep 2: Create the APT Keyring Directory
Create the directory that stores the signing key for the Claude Code repository. Run:
sudo install -d -m 0755 /etc/apt/keyringsThe command creates /etc/apt/keyrings if it does not exist and sets the appropriate directory permissions.
Step 3: Download and Verify the Anthropic Signing Key
Download the official Anthropic signing key and save it in the APT keyring directory:
sudo curl -fsSL https://downloads.claude.ai/keys/claude-code.asc \
  -o /etc/apt/keyrings/claude-code.asc
Verify the downloaded key by displaying its fingerprint:
gpg --show-keys /etc/apt/keyrings/claude-code.asc
Confirm that the fingerprint matches the official Claude Code release signing key:
31DDDE24DDFAB679F42D7BD2BAA929FF1A7ECACEThis verification confirms that the downloaded key matches the fingerprint published by Anthropic. Do not continue if the fingerprint does not match.
Step 4: Add the Official Claude Code APT Repository
Add the Anthropic repository to the APT sources list. The following command configures the stable release channel:
echo "deb [signed-by=/etc/apt/keyrings/claude-code.asc] https://downloads.claude.ai/claude-code/apt/stable stable main" \
  | sudo tee /etc/apt/sources.list.d/claude-code.list
The command creates the claude-code.list file and registers the official repository. The signed-by option tells APT to use the specified signing key to verify packages from this repository.
Step 5: Update the APT Package Index
Refresh the package index to include the newly configured Claude Code repository:
sudo apt update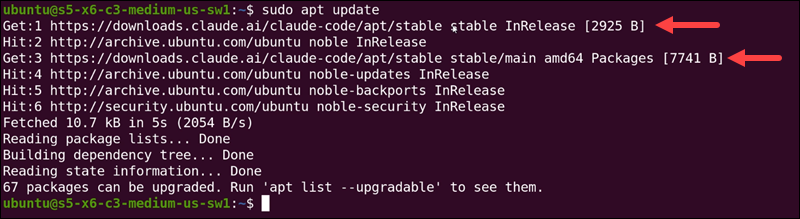
APT retrieves the available package information from the configured repositories.
Step 6: Install Claude Code Using APT
Install Claude Code through the APT package manager:
sudo apt install claude-codeAPT downloads and installs the package along with its required dependencies.
Step 7: Verify the Claude Code Installation
After installation, verify that Claude Code is available and check its installed version:
claude --version
The command displays the installed Claude Code version, which is often older than the one installed via the native script.
Run the diagnostic command to check the installation and identify potential configuration issues:
claude doctorNote that if you previously installed Claude Code using another installation method, claude doctor may report a warning similar to the following:

This warning may indicate that Claude Code references a previous native installation that no longer exists. It does not necessarily indicate a problem with the current APT installation.
To verify that the APT installation works correctly, check the executable location:
which claudeThe output should point to /usr/bin/claude. If Claude Code launches successfully in the next step, the APT installation works correctly, and you can safely ignore the stale installation warning. Do not run claude install to resolve this warning, as it may trigger the native installation process instead.
Step 8: Launch Claude Code and Complete Authentication
Launch Claude Code from the directory you want to work in:
claudeOn the first launch, Claude Code guides you through the initial setup. Select a terminal theme, confirm the working directory, and approve the folder trust prompt.
Follow the authentication instructions to sign in using an eligible Claude account or an Anthropic Console account with API billing enabled.
After authentication, Claude Code starts an interactive terminal session and is ready to use.
To close the session, run:
/exitStep 9: Update Claude Code Through APT
APT installations do not update automatically through Claude Code. Use the system package manager to check for and install available updates.
Run the following command to refresh the package index:
sudo apt updateThen, upgrade Claude Code if a newer package version is available:
sudo apt upgrade claude-codeMethod 3: Install Claude Code Using NPM
The NPM installation method provides an alternative for users who already work with Node.js and npm. It installs Claude Code as a global npm package, allowing users to manage it alongside other Node.js tools. However, this method requires a compatible Node.js environment and is deprecated by Anthropic. The native installer is the recommended option for new installations.
To install Claude Code with NVM, follow the steps below:
Step 1: Install Node Version Manager (NVM)
NVM manages multiple Node.js versions on the same system and allows users to switch between them without requiring administrator privileges.
1. Install NVM by running the following command:
curl -o- https://raw.githubusercontent.com/nvm-sh/nvm/v0.40.3/install.sh | bashThe installation script downloads and configures NVM for the current user.
2. Load NVM into the current Bash session:
source ~/.bashrc3. Verify the installation by displaying the NVM version:
nvm --versionStep 2: Install and Activate Node.js
Use NVM to install Node.js 22:
nvm install 22Activate the installed version:
nvm use 22Verify that Node.js and npm are available:
node -vnpm -v
The commands display the installed Node.js and npm versions. Claude Code requires a compatible Node.js environment for the NPM installation method.
Step 3: Install Claude Code Using NPM
Use npm to install Claude Code globally. Run the following command:
npm install -g @anthropic-ai/claude-code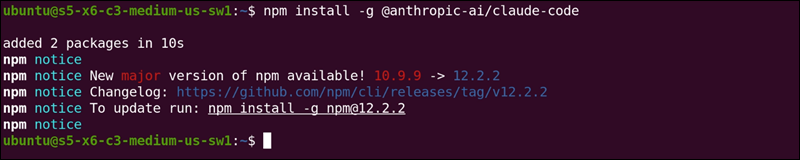
The -g option installs the package globally, making the claude command available from different working directories.
Step 4: Verify the Claude Code Installation
After installation, verify that Claude Code is available and display its version:
claude --version
Run the diagnostic command to check the installation and identify potential configuration issues:
claude doctorStep 5: Launch Claude Code and Complete Authentication
Launch Claude Code from the directory you want to work in:
claudeOn the first launch, select a terminal theme, confirm the working directory, and approve the folder trust prompt.
Follow the authentication instructions to sign in using an eligible Claude account or an Anthropic Console account with API billing enabled.
After authentication, Claude Code starts an interactive terminal session and is ready to use.
To close the session, run:
/exitStep 6: Update Claude Code Using NPM
Because the NPM installation method does not use the native installer's automatic update mechanism, update the package through npm when needed:
npm install -g @anthropic-ai/claude-code@latestThe command installs the latest available version of the Claude Code npm package.
Conclusion
This tutorial covered three ways to install Claude Code on Ubuntu: the recommended native shell script, the official APT repository, and NPM. The native installer is the simplest option for most users, while APT provides integration with Ubuntu's package management system. NPM remains an alternative for users who already manage Node.js environments, although Anthropic has deprecated this installation method.
For more information about setting up version control on Ubuntu, see how to install and set up Git on Ubuntu.